Category Archives: Cocoa
how to love (and read) crash reports

Crash Reports are essential, if often opaque, guides to problems in your app that every developer has to deal with from time to time.
For small enterprise developers like myself, commercial analytics aren’t really an option. And while there are open source alternatives like UKCrashReporter, I’ve been lucky enough to suffer relatively few crashes and typically just ask users to manually submit crash reports (stored in ~/Library/Logs/DiagnosticReports) as and when they occur.
Choosing a method of collecting crash reports is one thing, but scouring them for useful information is quite another, and the reams of data often included can seem a little overwhelming.
On a good day, your crash report may include a direct reference to the method or function that’s caused the issue, like this one from an early version of my troubleshooting app DetectX Swift:


On other days, though, you might get presented with nothing but a bunch of unhelpful memory addresses:


It’s at this point that you need to enlist the help of the built-in command-line tool atos. In the remainder of this post, we’re going to learn what it does and how to use it to find the line in our source code that caused the crash.
How does atos help?
The beauty of atos is that it will give you a reference to the source file, function and even line number in your code where the crash occurred. Given that it can do this for a crash that occurred on another user’s machine that you can’t reproduce locally and don’t have access to, this seems like nothing short of magic.
Here’s an example of what atos might provide from a crash log like the one above:
ViewController.checkReg(isCli:) (in DetectX Swift) (ViewController.swift:4042)
The output from atos tells me the name of the Swift source file, the name of the function and — here’s the truly wonderous part — even the line number: 4042.
This is all part of the magic of symbollication, which is such an esoteric word I’m not even going to try to spell it again :-). Instead, let’s just get down to the practical nitty-gritty of how to get this kind of data out of our users’ crash reports.
How to use atos
The method is fairly simple and goes like this:
1. Create a folder called “CrashWork”.
2. Go to Xcode’s ‘Organizer’, and right-click on the archive of the version of the app that crashed.


Choose “Show in Finder”. That takes you to the .xcarchive file in Finder, from which right-click again and choose “Show Package Contents” to open the package:


3. Click on the .dSYM file and make a copy of it. Switch back to your CrashWork folder and paste the copy in there. Grab a copy of the same version of your app that crashed (you can also get that from the Products folder in the .xcarchive package, if you don’t have one handy elsewhere) and place it in the same folder:


Important: Be sure you’re working with the same version of your app as the user; atos needs that to match up the addresses in the crash report, and any other version will produce incorrect results or an error.
4. It’s now time to head on over to the Terminal. cd into your CrashWork directory:
cd ~/Desktop/CrashWork
5. The format of the command is generally going to be like this (see man atos for options):
atos -o <path to executable> -arch x86_64 -l <load address> <address>
<path to executable> is the path all the way to the Mach-O binary in your app bundle in the CrashWork folder, so the path in my example looks like this:
atos -o DetectX\ Swift.app/Contents/MacOS/DetectX\ Swift -arch x86_64 -l <load address> <address>

You need to be careful to get the <load address> and the <address> the right way around. They are the reverse order of what you see in the crash log:
Now my complete example looks like this:
atos -o DetectX\ Swift.app/Contents/MacOS/DetectX\ Swift -arch x86_64 -l 0x10a10e000 0x000000010a16a601

6. Hitting ‘return’ produces the magic:


7. Now, going to my source file, I see exactly where the app crashed (lo! and behold, what do you know? An unwrapped optional, of course!):
Enjoy! 🙂
Featured pic: crash by febra-febra

how to protect your app from hijacking
I was lucky enough to get a great tip from MalwareBytes’ Thomas Reed this week on the possibilities of code hijacking.
Thomas was kind enough to share details of a talk he gave at MacTech last year, in which he demonstrated how some 3rd party apps are susceptible to having their binaries replaced by a fake binary even when the original application is properly code signed with a valid developer’s signature.
The vulnerability lies not so much in the code signing itself, but in the mechanism for when and why it gets checked. In short, code signing is checked when an app is first launched, but after that, except in a few special situations, macOS’s security mechanisms pretty much ignore it. That means once an app has passed GateKeeper, it’s a ripe target for attackers to come in and replace the binary with one of their own.
In order to ensure the app on disk is still in fact the app that was downloaded and first launched, developers need to implement a check on each launch.
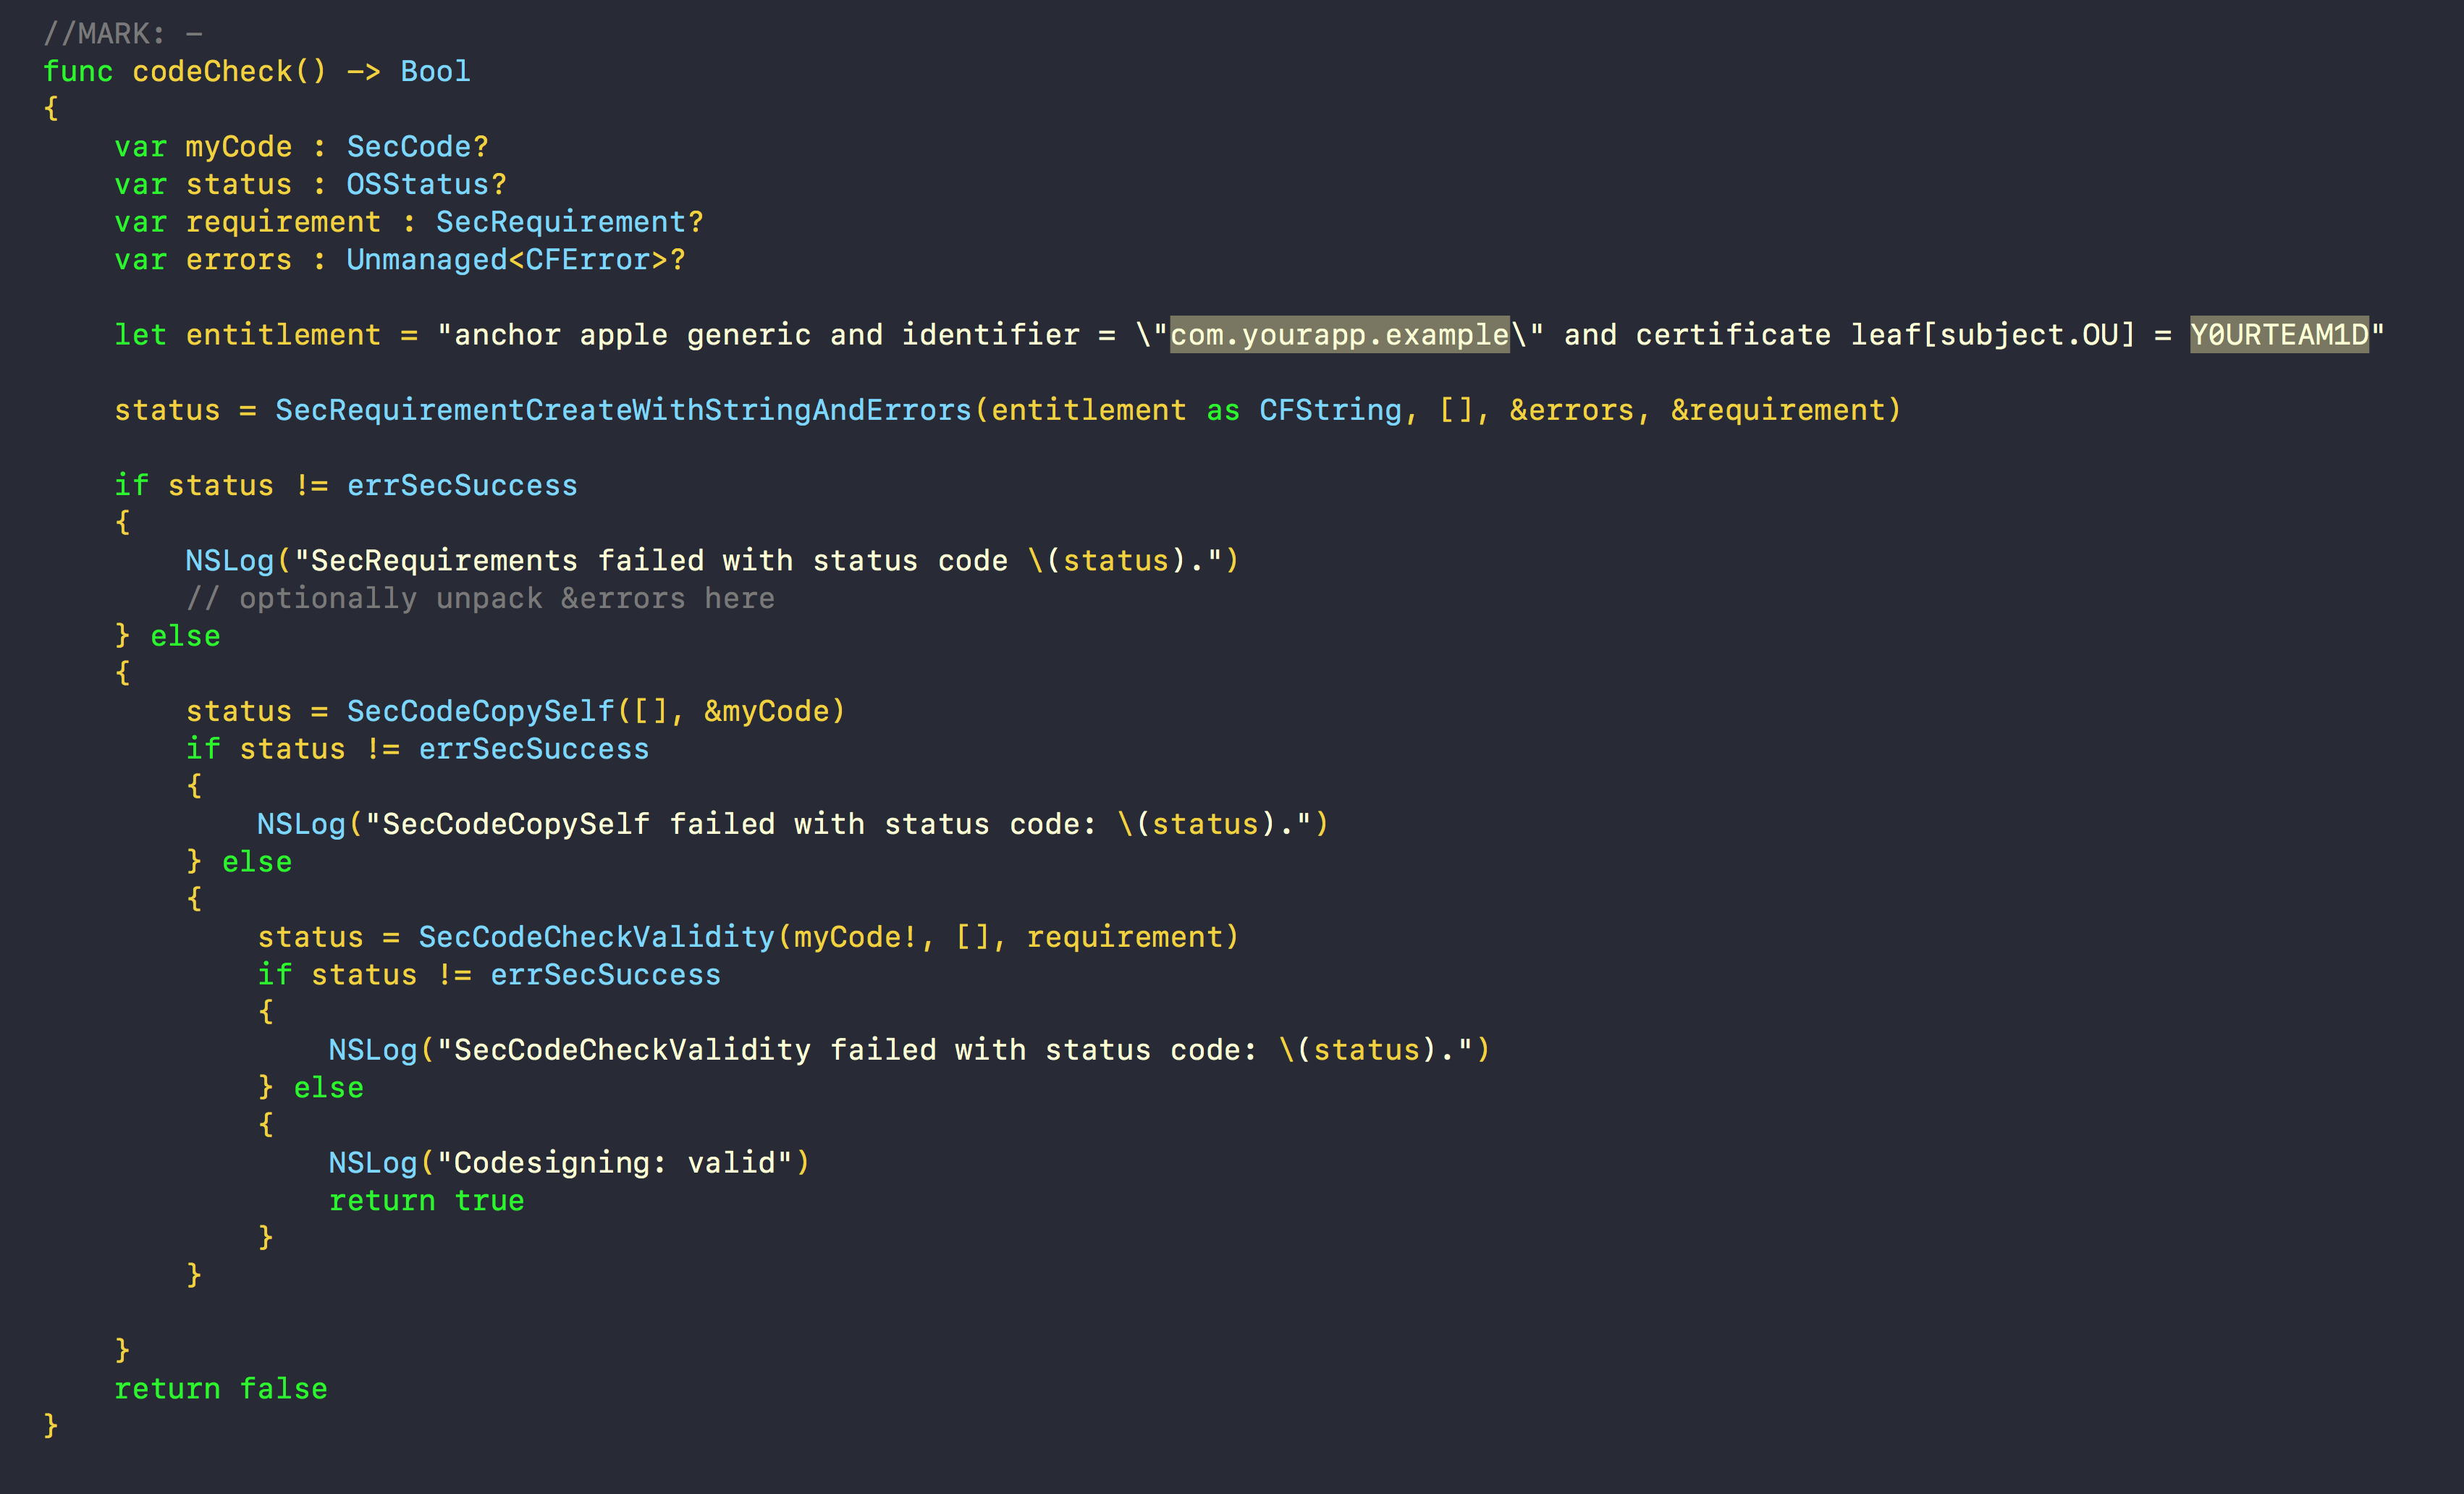
If you’re using Swift, some example code for doing that (pictured above) is available from my pastebin here. I’ve also got a version for Objective-C, adapted from here.
The key to it is what you specify in the entitlement constant. In this example, I’ve specified three things: that the code is signed by Apple, that is has the app’s bundle identifier and that it has the developer’s Team ID. Don’t forget to change my dummy values for your real ones in the code! You can get all these details for your app by running this in Terminal:
codesign --display -r- <path to your app>
With that information, the function verifies that the application in memory meets the requirements specified in the entitlement.
Call the function at some point after launch (e.g, when your main nib has loaded) and handle the boolean result appropriately. For example, if the function returns false, you might throw an alert like this one from DetectX Swift telling the user that the app is damaged and needs to be re-downloaded, and then terminate the app when they hit “OK”:
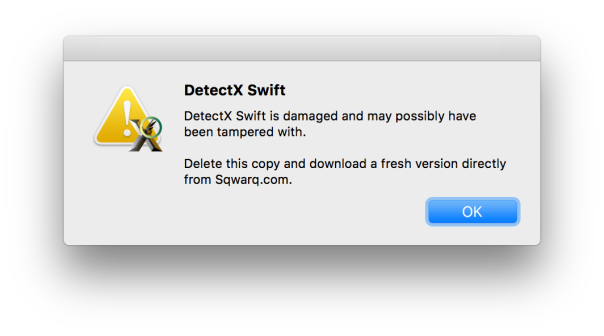
Let’s keep our code (and users!) safe everybody. 🙂
how to script with Objective-C

Is it me, or is AppleScript experiencing something of an Indian Summer? It seems everywhere I go, people are talking more about macOS automation, AppleScript and even Apple’s curious hybrid syntax AppleScriptObjC (ASObjC).
Of course, some people have suffered miserably at the hands of AppleScript in the past, and even though the thought of scripting with access to Cocoa APIs through Objective-C is tempting, they fear the AppleScript side of it.
If that’s you, bear in mind that AppleScriptObjC isn’t really “AppleScript + Objective-C” at all. It is actually just a dialect of Objective-C that will be accepted in the (Apple)Script Editor and can be run by an instance of the AppleScript component. In plainer English, you can use Objective-C in an AppleScript without any AppleScript whatsoever!
The point of doing so would be that one could package Objective-C code in a .scpt file (or scptd bundle or AppleScript .app), and also mix whatever scripting language you prefer with calls to Cocoa’s APIs.*
The problem that using ASObjC presents anyone familiar with Objective-C is how to translate ‘pure’ Objective-C into the dialect that Script Editor (and other applescript runners like FastScripts, Keyboard Maestro, Automator, etc) can understand. If you use LateNight Software’s Script Debugger for scripting, you’ll already know that the work is done for you by the app’s built-in code completion. If you’re battling on in Apple’s default Script Editor, you’ll need to do the translation manually.
By way of example, then, here’s some original Objective-C, and below it, a translation that would work in Script Editor:
Objective CNSString *aString = @"hello";NSString *bString = @" world";
aString = [aString stringByAppendingString:bString];
NSUserNotification *notif = [[NSUserNotification alloc] init];notif.informativeText = aString;[[NSUserNotificationCenter defaultUserNotificationCenter] deliverNotification:notif];
AppleScriptObjCset aString to NSString's stringWithString:"hello"set bString to NSString's stringWithString:" world"
set aString to aString's stringByAppendingString:bString
set notif to NSUserNotification's alloc's initset notif's informativeText to aStringNSUserNotificationCenter's defaultUserNotificationCenter()'s deliverNotification:notif
As you can see, there’s a direct 1-to-1 correspondence, with the 6 statements in Objective-C paralleled by the 6 statements in AppleScriptObjC.
The main peculiarity is the use of possessive word forms and that variable attribution is done by using "set X to Y" rather than "X = Y". Type declaration is done via the idiom 'set <var> to <NSObject>'s <class init method>', which returns an instance of the object just as it would normally. You call instance methods by putting the instance in front of the method just as you would in regular Objective-C (e.g, see line 3 of the examples).
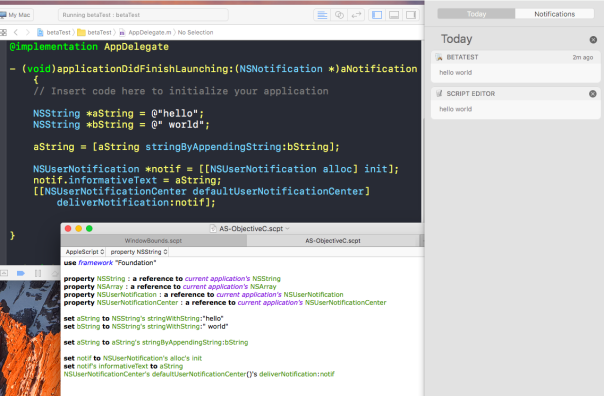
As you can see in the screenshot below showing Xcode and Script Editor, they work in the same way. You’ll notice in Script Editor there is a 'use' statement (equivalent to Objective-C’s ‘import’), and there’s also a whole load of property statements. These latter are peculiar to the ASObjC translation, and don’t have a counterpart in pure Objective-C. All you need to know about these is for each kind of Objective-C object you want to use (NSString, NSArray, whatever*), you’ll want a property statement for it at the beginning of the script. The statement always has the same form:
property <NSObject> : a reference to current application's < NSObject>
I think the best way to think of ASObjC was recently summed up by Sal Saghoian, when he said that ASObjC is “…the ultimate duct tape. You can do anything you want with ASObjC. You own the computer.”
Enjoy! 🙂
*not all Cocoa frameworks nor all Objective-C objects can be bridged to, but pretty much all the most useful ones are available.
Further reading:
– Applehelpwriter’s review of Script Debugger 6
– how to quickly toggle Swift Compiler warnings
Picture credits: Top image adapted from MilleniumBirdge by lesogard
applescript: get item number of list item

One of the annoying ‘missing features’ in AppleScript is the lack of any way to get the item number of an item in a list.
Fortunately, since Cocoa does of course include an ‘indexOfObject’ function, we can leverage Cocoa in our AppleScript to write a nice little handler (you could add this to my list and string handlers library I posted here or just add it directly in your own scripts).
First, make sure your script or library already has two lines like these to import the Foundation framework and declare an NSArray:
use framework "Foundation"
property NSArray : a reference to current application's NSArray
Then after that add the handler:
on getIndexOfItem:anItem inList:aListset anArray to NSArray's arrayWithArray:aListset ind to ((anArray's indexOfObject:anItem) as number) + 1 # see note belowif ind is greater than (count of aList) thendisplay dialog "Item '" & anItem & "' not found in list." buttons "OK" default button "OK" with icon 2 with title "Error"return 0elsereturn indend ifend getIndexOfItem:inList:
You can now call the code like this:
# exampleset thisList to {"I", "see", "a", "red", "door", "and", "I", "want", "to", "paint", "it", "black"}set aNum to its getIndexOfItem:"paint" inList:thisList(* Result --> 10 *)if aNum is not 0 then-- do somethingend if
# Note: Remember AppleScript lists are indexed from 1, unlike Cocoa arrays which start at index 0.
Enjoy! 🙂
news: sqwarq app updates
ust a quick post to let y’all know of a couple of updates to my apps.
1. OSXClock v1.8 has got a few new features including a handy ghost mode and variable transparency. Even better, I’ve removed the time-limit on the demo version, so you can now use OSXClock for free indefinitely (well, if that’s not an excuse to download it I don’t know what is… 🙂 ).
2. DetectX v1.21 now has the ability to trash files found in the search. I didn’t really want to add this, but so many users were having problems finding the invisible files belonging to MacKeeper I didn’t really have much choice. Note that the “Trash” function may require entering an admin password for each and every file that is outside of the user domain. DetectX is, of course, free to download and use, though donations are appreciated if you find it useful.
3. App Fixer is now out of beta and into first public release, version 1.0. Along the way it’s added a couple of extra fixes for Safari browser hijacks.
Enjoy! 🙂
how to learn more about error codes
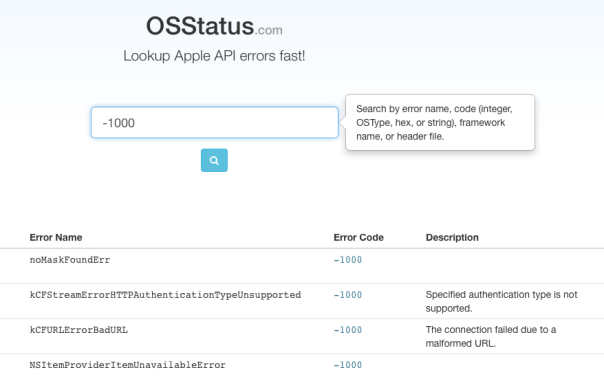
Scripters and coders are forever battling errors, and access to information on Apple’s error codes is always a bit of a hunt and dig around header files or documentation. Now thanks to Seth Willits from Araelium group, there’s a handy free search tool to spare us the effort.
I’ve already got osstatus.com bookmarked. Thanks Seth! 🙂
Cocoa: how to show a popover under selected text

Showing a popover underneath a piece of selected text is a trick widely made use of across OSX, not least in Xcode itself, but also in many other apps. In this post we’re going to look at a simple way to achieve this effect.
1. First of all, in IB drag out a Popover and View Controller and drop them in the Document Outline area. Drag a custom view to the canvas, and hook them all up thus:
Popover’s Outlets
delegate –> App Delegate (or class that will control the Popover)
Popover View Controller’s Outlets
view –> Custom View
Click the Popover object in the Outline area, and in the Attributes Inspector, set the Behaviour to Transient.
In the appDelegate.h file, or the .h file of the class that will control your popover, include the PopoverDelegate in the @interface declaration:
@interface AppDelegate : NSObject <NSApplicationDelegate, NSPopoverDelegate>
2. Still in the header file, you need to make sure the window that the NSTextView is in has a View outlet in its header file.
@property (weak) IBOutlet NSView *aView;
For my purposes, I just have a single window in the appDelegate class, so I just created a view property by control-dragging out of the Window’s view object to the header file. You’ll need to switch to the dual-view Assistant editor to do this:

While you’ve got the Assistant editor open, drag out an outlet from the Popover to the .h file and name it ‘popover’. Finally, in the same way create a similar outlet for your TextView.
4. Next, go into the implementation .m file for the appDelegate (or you class). You’ll need an IBAction to trigger the showing of the popover. In my case, I have an ‘Enter’ button the user hits after making a selection attached to a method I called enterSelection:(NSButton *)sender.
In this method, I first get the rect for the user’s selection with:
NSRect rect = [_textView firstRectForCharacterRange:[_textView selectedRange] actualRange:NULL];
That will return a rect in screen coordinates for the selected text. However, I need to convert that into the window’s coordinates with:
NSRect converted = [_window convertRectFromScreen:rect];
Now we’re ready to call the popover by supplying this rect to the first parameter and the View property we created earlier to the second parameter:
[self.popover showRelativeToRect:converted ofView: _aView preferredEdge:NSMinYEdge];
And that’s it. Your popover should show underneath the selected text whenever your method gets called. If you want to see how this is done step by step in Xcode, check out the video:

