Category Archives: El Capitan
What’s the difference between DetectX and DetectX Swift?

Since releasing DetectX Swift back in January, a lot of people have been asking me how the new ‘Swift’ version differs from the older one, aside from requiring 10.11 or higher (the original will run on 10.7 or higher).
Well sure, it’s written in Swift — and it’s much swifter, literally, but of course there’s a lot more to it than that.
I’ve finally had a spare moment to enumerate the feature list and create a comparison chart. Although the image above is essentially the same as the one you’ll see at the link address at the moment, there’s still a bunch of features to be added as we go through development of version 1. Thus, be sure to check the latest version of the chart to get the most up-to-date info.
Of course, if you have any questions drop me a comment below, or email me either at Sqwarq or here at Applehelpwriter.
Enjoy 🙂
how to easily spoof a user’s password

Spoofing or phishing – presenting a user with fake authentication requests – is a common email tactic, but it’s not the only vector where you need to be on your guard. Every version of macOS is vulnerable to a very simple phishing attack right on your desktop that doesn’t require admin privileges to run, would not be detected by GateKeeper or XProtect, and which could easily be placed on your mac by any of the nefarious malware / adware installer scripts that come with some less reputable software downloads.
This attack isn’t new, but it’s not often talked about. The easiest way to see how it works is in this quick 4-minute demo:
As you can see, it’s easy to grab the icon of any Application and put it in the script; it doesn’t even have to be the icon of an app that’s running. The simple demo I gave above could easily launch iTunes first to increase the coherence of the attack, or it could use a completely different icon, including the icon of security programs you may have running on your mac.
How can you check?
If you were presented with a password request like this and wanted to check whether it’s legitimate or not, an easy way would be to use my free utility DetectX Swift’s Profiler. Click the Profiler function, and search for ‘osascript’ within the Running Processes section. Note how DetectX Swift shows you the text of the script being run, confirming that this dialog is up to no good:

how to create a bootable macOS installer

If you are preparing to install macOS on multiple computers, one of the things that can make your life simpler (and the waiting shorter) is a bootable USB installer.
The idea of the installer is that you only need to download the macOS Installer.app from the App Store once. Usually, when you run the installer after downloading it, it’ll delete itself and you have to go through the whole download process again on each machine or disk that you want to install macOS onto. By making a bootable USB drive, you simply plug the drive in to your mac, launch the installer app and tell it where to install the OS. You can repeat this as many times as you like as the installer will remain safe on your USB.
There are various ways to make a bootable USB installer, but they all involve the same process:
1. Download the macOS Installer from the App Store.
2. Run the createinstallmedia command from the Terminal, an AppleScript or a helper app.
3. Reboot your mac, choosing the newly created USB as the startup disk.
4. Run the installer.app from the USB.
Step 2 is where the fun is. The createinstallmedia command can be tricky to get right, particularly if you’re not familiar with working on the command line. For those of you that are, follow Apple’s instructions here.
For a little more convenience, I wrapped all that inside an AppleScript which will first ask you for the location of the installer, then ask you to choose the USB target.
For maximum convenience, I also wrote a free little Swift app I’ve dubbed ‘Boot Buddy‘ (cos “Create bootable macOS Installer Drive.app” just didn’t quite have the right ring to it..!) that will present the whole thing in a neat little user interface. Three clicks, more or less, and you’re done.
Boot Buddy doesn’t require an admin password to install, but you do need to provide an admin password to actually create the bootable installer as the createinstallmedia process has to be run as root. Boot Buddy doesn’t see or use this in any way whatsoever other than to start the createinstallmedia process or to cancel it (if you choose to do so); authorisation is handed off to macOS to take care of.

Boot Buddy requires macOS 10.11 or higher and can create bootable USBs from Mavericks, Yosemite, El Capitan, Sierra and High Sierra installer apps.

Share and enjoy! 🙂
how to track your clones

Last week I was asked whether I could produce a script that would keep track of Carbon Copy Cloner backup tasks so that a user could tell which of many, multiple backups of the same source disks were the most recent.
Of course, CCC has its own Task History and Disk Center functions to provide information, but these turn out to be insufficient in common scenarios. To see why, let’s consider a hypothetical task set-up and recovery situation.
In this situation, let’s suppose I’m keeping 2-hourly, daily and weekly clones of my mac’s internal disk. While I’m logged in to my mac, I can of course check CCC’s Task History to see when the last back up was, the destination, and whether it was successful or not.

However, suppose the internal disk fails – just the situation for which I keep my CCC backups on a regular schedule. Which disk contains my latest backup? The information from CCC’s history task is on the failed internal disk, so it is not now available to me. Of course, each backup contains CCC’s earlier History too, but there’s several problems here. First, these cloned task histories do not contain the history from the *last* task (that’s only written to the source disk after the last backup completes). Second, to compare them, I’d have to boot each clone individually – a time-consuming and not terribly convenient process. Third, CCC’s ‘Disk Center’ only provides backup information about connected disks if the current startup disk was used to run the backup task. Thus, if I backup Disk B from Disk C, that information won’t be available to me when I startup my mac with Disk A.
Before I discuss the solution to this, let me just complicate the scenario further. I have two other macs – two 13″ MacBook Pros that have been going strong since 2009 – each of which I backup to individual clones. There’s no way for me to see all the backup dates from all my macs with CCC. Further, we don’t need to consider only disk failure as a reason to need comparative backup history. Since some files are shared or swapped across my three macs, there’s no way to find out from CCC’s Task History or Disk Center when the latest backup of any particular one of those files was made, or on which backup disk I can find it. For example, the connected disk ‘MBP Z Clone’ is a scheduled task on my MBP, but looking at this disk when connected to my iMac gives me no information about its backup history:

Fortunately, CCC has two features which make our problems solvable. First, each source disk keeps detailed logs of the backups it has run (from which the Task History and Disk Center info is constructed); secondly, CCC allows us to run a shell script after each task has completed.
These two little features are going to allow us to build a shell script that will write a special log file to the destination after each task completes, and then retrieve it and compare it against both the current source and other disks. That means we’ll be able to get CCC backup data from any disk we connect to any mac, since the data will be stored on the destination disk itself thanks to our shell script (for the technically minded: to avoid permissions problems, the script writes to /Users/Shared/ if it’s a bootable clone, or to the root of a disk that isn’t).

That’s the outline of the problem and the solution. What started out as a simple AppleScripting task soon blossomed into a full-blown app. Although much of the background work I’ve outlined above is achievable via AppleScript, displaying the data effectively is rather cludgy, even if one uses some of the excellent scripting libraries like Shane Stanley’s ‘Myriad Tables’ to improve on the stock AppleScript offerings.
Accordingly, after about a week or so of wrestling with an acceptable solution, I finally came up with the Disk Inspector.app to solve all these problems in one go and add a few niceties on top. 😉
Whatismore, since it’s Christmas :D, I’m publishing this as a free utility on my software site, Sqwarq.com. Check out Disk Inspector’s support and download page here: https://sqwarq.com/disk-inspector
Here’s a quick overview of the main features:
1. See dates of all connected disks that have been backed up via CCC*
2. See the latest backup and (if available) Time Machine backup for the current source disk
3. See the OS Version and Build Number on connected, bootable drives
4. Open any disk’s root folder in the Finder by double-clicking its name in DI’s main view
5. See an estimate of the total and available space on each disk (rounded to the nearest GB)
6. Save all the data to a log file for easy record keeping of your backups
* after completing Disk Inspector’s set up procedure
Usage:
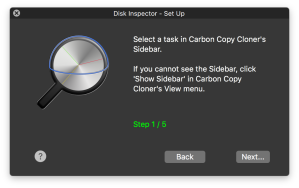
For full instructions refer to the Support page, but the basic idea is that on first launch, you run the ‘Set Up’ wizard to configure your tasks in Carbon Copy Cloner. Disk Inspector’s ‘Set Up’ wizard walks you through 5 simple steps to accomplish all this.
Once you’ve completed the set up procedure and each of your scheduled CCC tasks has run, you’ll start to see information for each backup disk in Disk Inspector’s main view on any mac (or on the same mac booted from a different drive) that you subsequently connect those disks to.
Disk Inspector runs on 10.10 and higher.
Enjoy, and Happy holidays to all!😀
revealing Dropbox’s dirty little security hack

Update: also see Discovering how Dropbox hacks your mac
If you have Dropbox installed, take a look at System Preferences > Security & Privacy > Accessibility tab (see screenshot above). Notice something? Ever wondered how it got in there? Do you think you might have put that in there yourself after Dropbox asked you for permission to control the computer?
No, I can assure you that your memory isn’t faulty. You don’t remember doing that because Dropbox never presented this dialog to you, as it should have:

That’s the only officially supported way that apps are allowed to appear in that list, but Dropbox never asked you for that permission. I’ll get to why that’s important in a moment, but if you have the time, try this fascinating experiment: try and remove it.
Ok, you say, no problem. We all know how to do that – open the padlock, un-click the checkbox. Click the ‘-‘ button to remove it from the list. Simple, right? Look there it goes, no more Dropbox in the the Preferences panel, right?
Wrong…like a bad penny it’ll be back again before you know it. Either log out and log back in again or quit Dropbox and restart it. Dropbox will surreptitiously insert itself back in to that list AND the checkbox will be checked. That’s the magic of Dropbox for you. If you don’t want to try it for yourself, watch me do it:
That leaves a couple of questions. First, why does it matter, and second, is there any way to keep using Dropbox but stop it having access to control your computer?
There’s at least three reasons why it matters. It matters first and foremost because Dropbox didn’t ask for permission to take control of your computer. What does ‘take control’ mean here? It means to literally do what you can do in the desktop: click buttons, menus, launch apps, delete files… . There’s a reason why apps in that list have to ask for permission and why it takes a password and explicit user permission to get in there: it’s a security risk.
Interlude: Contrary to Dropbox’s completely spurious “explanation”/obfuscation here, Accessibility has nothing at all to do with granting permissions to files. Accessibility frameworks were first introduced in Mac OS X 10.2 and expanded in 10.3 to allow control of user interface items via System Events and the Processes suite. As anyone can readily see, what that allows is GUI control just as if the program or script was clicking buttons and menu items.
But perhaps you implicitly trust Dropbox to not do anything untoward. After all, they’re a big name company who wouldn’t want to upset their customers, right?
There’s two flaws in reasoning that way. One: the bigger the name, the less effect customer dissatisfaction has. Let’s face it. If a 1000 people read this post and stop using Dropbox because of it, it’s not going to make much difference to Dropbox. So assuming you can trust a “big name” company not to “feck you off’ because they might lose your business is not “smart computing”, even less smart if they figure that you’re a customer on a free plan anyway… :p (See this for more reasons why big companies in general don’t pay much attention to ethical values). Two, and more importantly, you already have hard proof that Dropbox can’t be trusted. It just overrode your and Apple’s security preferences without asking you, and – as you’ve seen if you tried to remove it and noticed its magic reappearance act – it disregards your choices and re-inserts itself even after you’ve explicitly removed it (we’ll sort this naughty behaviour out in a minute).
It matters for another reason, too. Let’s assume for the sake of argument that Dropbox never does any evil on your computer. It remains the fact that the Dropbox process has that ability. And that means, if Dropbox itself has a bug in it, it’s possible an attacker could take control of your computer by hijacking flaws in Dropbox’s code. Of course, that’s entirely theoretical, but all security risks are until someone exploits them. The essence of good computer security and indeed the very reason why OSX has these kinds of safeguards in place to begin with is that apps should not have permissions greater than those that they need to do their job.
Which is the third reason why it matters: Dropbox doesn’t appear to need to have access to Accessibility features in order to work properly (update). I figured out what Dropbox was up to in October 2015. Why has it taken me this long to write about it? First, because after having reported it to Apple Product Security at that time, I wanted to see if they would force Dropbox to change this behaviour (they haven’t…yet ;)). Second, because the only way I could be sure that DB didn’t need to be in the list of apps with Accessibility privileges was to test it over a period of time. I use Dropbox across 3 different macs and an iPhone. I haven’t experienced any issues using it whatsoever while denying it access to Accessibility. Caveat: I haven’t tested Dropbox against all of OSX’s Accessibility features, but certainly for a ‘standard’ set up of OS X, it is not needed – and, let me repeat, even if it were needed for some particular feature to work, Dropbox should have explicitly asked for this permission, like every other app, and obeyed the user’s decision to revoke that permission when removing it from the list of allowed apps.
There really isn’t any excuse for Dropbox to ride roughshod over users’ security and preference choices. So that leaves us with just one last question: how to get Dropbox out of there? The short answer is that you first quit Dropbox, then remove it from the Accessibility pane, then delete the DropboxHelperTools folder (see my procedure here). Relaunch Dropbox, but now you hit ‘Cancel’ when it asks you for an admin password:
Stop! Choose ‘Cancel’ !!!
The dialog box apparently lies (again, still trusting this big name firm?) when it says Dropbox won’t work properly and clearly deceives because this is NOT the dialog box that Dropbox should be showing you to get access into Accessibility. Indeed, even with your admin password, it still shouldn’t be able to get into Accessibility. Clearly Dropbox’s coders have been doing some OS X hacking on company time.
Now, there’s a slight catch. So long as you never give Dropbox your admin password, it won’t be able to install itself in Accessibility and you can keep on using Dropbox just as you have done before. However, it will throw up this dialog box on every restart of the machine or relaunch of Dropbox. So the catch is that you have to actually notice what’s asking you for your password and not just blindly throw your password into the box without looking. :O
But you shouldn’t be doing that anyway, of course, cos that’s not good security practice… 😉 , but given that the dialog box looks just like*** an authentic password request from the OS itself, that may be a habit you have to train yourself into.
Slightly annoying, but not as annoying as having an app hack your mac (of course, if you forget, you’ll have to go uninstall Dropbox again, remove it from Accessibility, then reinstall it).
***But not “like” enough – note the ‘Type your password…’ sentence is both misaligned and is spaced into a separate paragraph, unlike genuine authentication requests from OS X. The phrasing of the first sentence “your computer password” is also very “un-OS X”.
Further Reading: Discovering How Dropbox Hack’s Your Mac
Last edit: 21 Sept, 21:35 ICT.
Script Debugger 6: the complete review

It feels like cheating. When you’ve spent pretty much your entire AppleScripting life behind the wheel of Apple’s austere Script Editor application, taking Script Debugger 6 out for a 20-day spin feels like someone’s let you in on a secret you’re not supposed to know. Hurdles you’ve taught yourself to clear – through considerable effort, frustration and no small amount of bloody-minded tenacity – are removed before you get to them; obstacles you’ve habitually steered around or avoided have disappeared, and dark holes of AppleScript mystery appear, in the light shone on them by SD6, to be not the menacing entities you once feared but new friends that offer ways to do things faster and more effectively. The secret that Script Debugger seems to lay bare is that AppleScripting doesn’t have to be as painful as we’ve been conditioned to believe. And that does feel like a cheat. Read the full review…

