Category Archives: Mavericks
discover 10 new OS X shortcuts

No matter how many times I visit this page, I always find something new that I hadn’t tried before. So the title of this post is more of a suggestion than a description. Why not take a poke around Apple’s shortcut list and discover ten that you don’t already know? I’m going to give a quick round up of ten shortcuts that I use on a regular basis.
1. ⌘ ⌃ Space
Command-Control-Space is a universal shortcut (i.e., you can use it no matter what application is currently active) for bringing up the character viewer (see the screenshot, top of page). In order for it to work, the cursor must be in a text field where character entry is possible, but you can use it literally anywhere: text documents, search fields, browser bars, save dialogs, etc. I used it heavily in creating this post!
2. ⌘ ⌃
Command-Control-Eject saves you having to trawl all the way up to the icon top left of your screen and choose ‘Restart…’. It’ll give you the chance to save any unsaved work or cancel the shutdown. This shortcut has a cousin, too: add the option key (⌘ ⌥ ⌃  ) to the mix and you get Shutdown instead of Restart.
3. ⌘ ⌫
One of my pet annoyances is continually being asked if I want to save ‘Untitled’ documents, those that I’ve never saved before, when trying to quickly quit an app. Having to take my fingers off the keyboard to move the cursor down to that ‘Delete’ button is time-consuming, and tabbing to it takes multiple hits of the tab key. Fortunately, ‘Command-Delete’ will let you discard the document immediately from the keyboard in one quick shot.

4. ⌘ G
Most people are familiar with invoking ‘Find’ on a page by using ‘Command-F’, but have you ever got annoyed by having to mouse up to those tiny little jump arrows in order to cycle through the hits?

Save your eyes and use Command G instead! Note that you have to invoke Find with ‘Command F’ first.
5. ⌃A, ⌃E, ⌃K
That’s three separate shortcuts not one! In any text field, Control-A moves the cursor to the beginning of the line; Control-E moves it to the end, while ⌃K deletes everything from the cursor to the end of the line. Old-hands of the Terminal and other command-line utilities will know these well, but even they may be surprised that these work across a wide-range of GUI apps, too. Particularly useful in Web browser address bars, search fields, Spotlight and so on.
6. ⌘ L
Command-L in Safari and other browser-based apps (including Xcode’s Documentation viewer  ) will immediately move the focus to the address bar/search bar and allow you to edit its contents. No clicking necessary!
7.⌘ ⌃ 1, ⌘ ⌃ 2, ⌘ ⌃ 3
Three commands new for Safari’s sidebar. Respectively, open the sidebar with Bookmarks showing, with Reading list showing, and with Shared links showing. Hitting the same shortcut again toggles the sidebar closed. Note that those are the numbers ‘1’, ‘2’ and ‘3’, not F1, F2, F3.
8. ⌘ ⇧ A, ⌘ ⇧ U, ⌘ ⇧ H, ⌘ ⇧ D
Again, that’s 4 different shortcuts, this time for the Finder. OK, hands up all those that switch to the Finder, hit Command-N to open a new window, and then click to their Desktop? Save yourself the grief (and the time), just activate Finder and hit Command-Shift-D. No need to open a window first, the shortcut will open a new window for you showing your Desktop folder. The others do the same thing but for different folders: Command-Shift-A opens your Applications folder, Command-Shift-U the Utilities folder, Command-Shift-H opens your Home folder.
9. ⌘ F1
This one’s for those of you with dual monitors or when your Mac is hooked up to a projector. Command-F1 toggles between mirroring and separate monitor views. Great for presentations.
10.(fn) ⌃ F8
Control-F8 activates the Status bar (top right row of icons on your screen). Use the left/right arrow keys to move along them, and the up/down arrows to select things in any menu. Hit ‘enter/return’ to perform the action. Note that on laptops you may need to invoke the fn ‘Function’ key, depending on your settings in Keyboard Preferences.
This is a great one for turning on/off Bluetooth, Wifi and checking Mavericks’ new Energy monitor in the Battery/Power icon. Mostly though, I use it for manually starting Time Machine backups or entering TM’s “star wars” interface (oh, and as a bonus…note that (fn) ⌃ F2 activates the other side of the menu bar (i.e., the menu). Enjoy!

Got your own favourite shortcuts? Tell us what you use most in the Comments! 🙂

how to delete a tag
here are multiple ways to remove tags in Mavericks. Which method you use partly depends on whether you want to:
1. delete a tag label from an individual file or files; or
2. delete an entire tag label from your system.
In this post, I’ll give you a couple of ways to do both.
1. Deleting a tag label from an individual file or files
There are several ways to do this. First, you can select the file in a Finder window and choose the ‘Edit Tags’ button in the Finder window Taskbar. From the popover menu that appears, simply click in the tab box and hit the ‘delete’ or backspace key to remove the tag. Hit ‘return’ to finish. Hitting ‘esc’ will close the popover but undo the removal of the tag.

Alternatively, you can click a file’s ‘Get Info’ window (or do ‘Command-I’) and remove the tag from the field there.

2. Deleting a tag label from your entire system
There’s also a couple of different ways you can do this. If you have the tag that you want to delete showing in the Finder sidebar, you can right-click on it and choose ‘Delete Tag “<tag name>” from the contextual menu.

You can achieve the same thing by opening Finder preferences, choosing the ‘Tags’ icon in the toolbar, and right-clicking on the tag you want to delete. Again, you’ll be presented with a ‘Delete Tag “<tag name>” option. Click and go!

🙂
power button doesn’t display shutdown dialog box

Don’t worry, the old functionality is still there, it’s just that Mavericks has re-programmed the power button slightly. Here’s what it now does:
Press and release: put the Mac to sleep.
Press and release with Control ^ key: display the ‘Shutdown’ dialog box.
Press and hold (release after 3 seconds): display the ‘Shutdown’ dialog box.
Press and hold (10 seconds): instant power off (aka “hard shutdown”).
🙂
the new Merge All Windows command

One of my favourite new commands in Mavericks is Finder’s ‘Merge All Windows’. You can find this in the Finder’s menu bar Window menu, but note that it’ll be greyed out if you only have one Finder window open (one of my other new favourites is ⌘ ^ space. Try it in Text Edit or Safari’s search bar, but I digress…:p).
To see ‘Merge All Windows’ in action, open up two or more Finder windows. Throw one or two on different Desktop spaces for good measure, then hit the ‘Merge All Windows’ command.
Yes, you get all your open windows from wherever they’re distributed slamdunked into one window with multiple tabs. If, like me, you work across multiple monitors and have multiple desktop spaces on each, Finder windows can rapidly start to multiply and this command is a real boon.
In fact, I like the ‘Merge All Windows’ command so much I even made a shortcut for it in System Preferences > Keyboard > Shortcuts (see the screenshot at the top of the page)
One final trick while we’re on the subject of tabs in Finder windows, note that you can open any folder item in your Sidebar into a new tab automatically by holding down the ⌘ ‘Command’ key and clicking on the Sidebar folder item.
🙂
Mavericks failed to download

Quite a lot of traffic going through Apple’s servers with the announcement that everyone with Snow Leopard or later can download Mavericks for free yesterday (the list of compatible machines is the same as for Mountain Lion, see here to check if yours qualifies).
This can be quite annoying as the download can go right up until the final few minutes and then return the error.
Alas, if you keep getting the ‘failed to download’ message, the only advice is to sit and wait it out till traffic subsides a little, I’m afraid. If you haven’t done so already, use the time to make a backup of your system and clear out your login items (System Preferences > Users & Groups (or Accounts for SL users) | Login Items. For more general advice on what to do to ensure a smooth upgrade, read the tips here.
Note: if you’re getting the ‘This copy of Mavericks can’t be verified’ message while using an USB installer, have a look here for a likely explanation and solution.
🙂
the end of “tell”?

With all the excitement over Mavericks’ fancy new apps, memory compression and Finder enhancements, perhaps one of the most revolutionary changes to go largely unnoticed is to the venerable (yes, it’s 20 years old, this year!) programming language AppleScript.
Apple have quietly introduced a new command to the AppleScript language called ‘use’. In effect, ‘use’ replicates the preprocessor ‘import’ directive familiar to Objective C users or the ‘include’ directive known to C programmers. This is likely to have a radical effect on how people learn and write AppleScripts.
Although ‘use’ seems primarily intended as a means to turbo-boost AppleScript by making available Objective C methods to scripters, it can also be used to import the scripting language of any app on your system. With that power, the whole concept (and limitations) of the ‘tell’ block are done away with. To see how this works in practice, take a look at this short script for toggling Bluetooth depending on your power source that I wrote pre-Mavericks, using tell statements and blocks:

Compare that with how we will do it now in 10.9 with the ‘use’ statement*:

Not a ‘tell’ in sight! Note the three ‘use’ declarations at the beginning of the script. The first one tells the script editor to include terms from System Events scripting dictionary. The second one does something similar with terms from System Preferences, but you’ll notice the syntax is slightly different. In the second declaration, I’ve taken advantage of the optional means to define a global text substitution for the expression “application System Preferences”. If you’re familiar with the #define directive in Objective C, or with using global properties in AppleScript of old, you’ll understand how this works. If you’re not, the short version is that we’ve declared a global variable of the sort which allows us to use the expression SysPrefs wherever we would normally have used the string application "System Preferences".
Don’t overlook the third ‘use’ statement in my example script above. Using ‘use’ effectively disables scripting additions (that includes all your familiar ‘display dialog’, ‘clipboard’, ‘path to’ and other essential expressions). In short, if you include any ‘use’ statements, be sure to also add the ‘use scripting additions’ statement, too.
There’s a lot more to using ‘use’ (you can read the full documentation here), but overall I think this is a positive change. However, if you’re fond of ‘tell’ don’t despair. At least for now, there’s no sign that ‘tell’ is being deprecated and you can carry on using it just as before.
🙂
*Note that there are other changes in the Mavericks version of the Bluetooth toggle script (in the ‘if…else’ blocks) due to the fact that Mavericks has changed the Bluetooth system prefs pane.
enabling Assistive Devices in 10.9
In Mavericks, Accessibility for Assistive Devices is no longer a global setting, but has to be turned on explicitly on an app-by-app basis. That setting has now moved to the Security & Privacy pane in System Preferences.
If you’re running System Events in AppleScript, Automator or using apps like BetterTouchTool that require Assistive Devices, you’re likely to come up against an error message. For example, a simple script like this:
tell application “System Events”
tell application process “Safari”
UI elements
end tell
end tell
will return an error message like this:
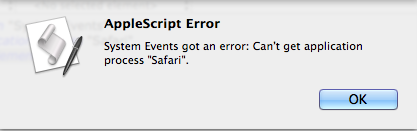
The first time this happens, you should get prompted with another dialogue box that looks like this:

Click the button ‘Open System Preferences’. If you accidentally hit ‘Deny’, just go to System Preferences in the normal way and choose the ‘Security & Privacy’ panel.

Click the padlock at the bottom left, enter your admin password, and check the boxes in the panel for the app that’s requesting access.
🙂
FastTasks – free download

I’ve been planning this ever since I first wrote a shell script along the same lines. All it needed was a nice interface, and that’d be something I could use almost everyday. Well, it only took me 8 months to get round to it, but here it is. 😉

Download FastTasks»
FastTasks allows you to achieve a number of things that you would normally have to roll up your sleeves and do in Terminal or AppleScript.
The window consists of two columns: left-side for info, right-side for actions. Here’s a detailed breakdown of functions with possible uses.
–Left-side (Info):
OS X Version:
Displays your current OS Version and build number
Startup Disk:
Displays your boot volume
I sometimes forget which particular volume I’m booted into, so this is vital info for me and anyone who’s regularly booting in and out of different installations.
Router IP:
The IP address of your network router
This can be useful for troubleshooting or if you need to access your router’s Admin page.
Just select the address and paste it into Safari’s search bar.
Local IP:
Your node on the local network
Useful to copy and paste if you need your local IP/ network node.
External IP:
How the rest of the world sees you
Very useful if you’re using proxies and want to check whether they’re working.
Installed Ram:
Just a courtesy reminder, but the real value here is the summary of usage stats underneath. These are pretty good approximations to what AM shows on my 10.8, but there are discrepencies on some versions of OS X between what ‘top’ shows and what Activity Monitor shows. FastTasks uses the same information that you’d get if you used the ‘top’ command in Terminal.
By the way, there’s a refresh button (keyboard shortcuts shown) for both the memory usage and network addresses, as the displays do NOT update continuously. Using the refresh buttons does not CHANGE anything on your system: They just update the display to reflect the current state of the system.
–Right-side (Actions):
Show hidden files:
Reveal or hide the hidden files and folders in the Finder whose names begin with a period
This is probably the most useful function of the app as it provides a dead easy way to hide and unhide system files without messing around in Terminal.
Show User Library:
Reveal or hide the User Library in the Finder
Likewise, this hides or unhides the ~/Library folder in Finder. This is ‘hidden’ in a different way from files that begin with a period, and its setting can be manipulated independently of that setting, so you can have the User Library showing, but ‘hidden’ files still hidden.
Flush DNS Cache:
Flush the cache that resolves internet domain names into IP addresses
Flushing the DNS cache can sometimes help resolve problems when you can’t access certain websites. Depending on what system you’re running, you may or may not see a ‘Requires Admin password’ warning next to this button. If you see the warning, then when you press the button the system will ask you for your password. The password request is from OS X and it goes to OS X: It’s not called, seen or stored by the app itself.
Free Memory:
Purge the RAM of inactive memory
Again, depending on what system you’re running, you may or may not see a ‘Requires Admin password’ message. On Snow Leopard, this requires the Command Line Tools supplied with Xcode, so if you see a message telling you to install Xcode, you may have to live without it (availability of Xcode for Snow Leopard these days is a bit hit and miss). You’ll also see the information on the left-side refreshed under ‘Usage’ when you use the free memory function and it successfully completes.
NOTE: on some systems where both Flush DNS Cache and Free Memory display ‘Requires Admin password’, note that after supplying the password for one of those actions, the user will be able to perform the other action without authenticating for a period of around 5 minutes (unless the sudo timeout setting has been altered by an Admin user).
Lastly, at the bottom of the window you’ll see a tiny plea to donate if you find the app useful ;). Note that the underlined text ‘Applehelpwriter’ and ‘Donate’ are hotlinks that if clicked will launch Safari and load a tab with this site and a Paypal donate page, respectively.
I hope you enjoy using FastTasks. Please read the provided Licence and User Guide that are in the download. Thanks! 🙂
how to see recently accessed files

While professional troubleshooters will use software like fseventer or the Instruments.app that comes as part of Xcode, there’s an easy way for anyone to see which files have recently been accessed on their Mac.
1. Open any Finder window and hit ‘command-F’.
2. Click the ‘Kind’ button and choose ‘Other’ at the bottom of the menu:

3. Next, scroll down the list till you see ‘System files’ and check the box and hit ‘OK’.
4. Change the button that says ‘aren’t included’ to ‘are included’.
5. Now hit the little ‘+’ button over on the right side of the window.
6. Again, change ‘Kind’, this time to ‘Last Modified’ and change ‘within last’ to ‘today’.

7. Finally, go to Finder > View menu at the top and choose ‘Arrange By > Date Last Opened’.
You can save the search in the Sidebar for convenience. Give it a more useful name like ‘latest changes’ or ‘fs events’ (“fs” stands for filesystem) and click on it whenever you need to check what’s just happened to your Mac! 🙂


