Blog Archives
Carbon Copy Cloner: see last back up date
If you’re a user of Bombich Software’s excellent Carbon Copy Cloner but you’re not doing backups as scheduled tasks, you may wish there was a way to find out the last time you successfully completed a backup task.
Unfortunately, CCC doesn’t provide an easy way for users to see this information natively, but in this post we’re going to add it through a bit of AppleScript and Automator magic.
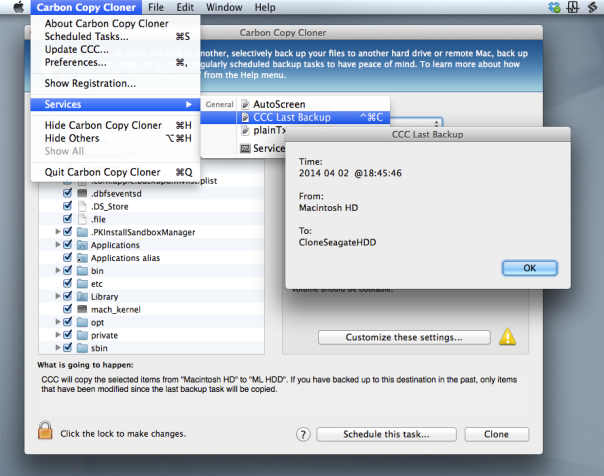
As it turns out, CCC does keep a log of all your past backup details stashed away in a CCC.log file buried in your local domain’s Library folder. You can view this file in Console, but it’s a bit of a pain. Wouldn’t it be nicer if you could just hit a hotkey like ‘Command-Control-C’, say (you know, for ‘CCC’🙂 ), and get a dialog box like this:

If you think so too, then download my Automator workflow:
For Lion, Mountain Lion and Mavericks:
Download for 10.7.5 thru 10.9.2 
For Snow Leopard:
Download for 10.6.8 
Double-click on the .zip file and double click again on the unzipped workflow file. You’ll get a warning message saying that you’ve downloaded the file from the internet (from me, actually!). After clicking ‘Open’ to dismiss the warning, for all users except 10.6, click ‘Install’ on the the following dialog box:
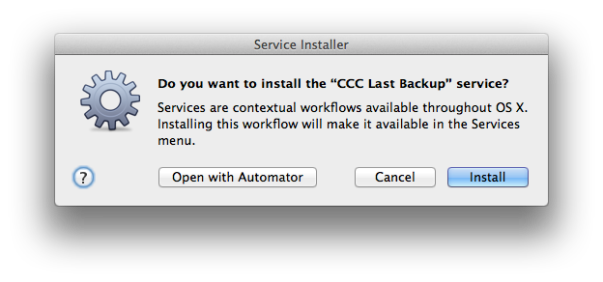
After clicking ‘Install’, click ‘Done’ to dismiss the confirmation dialog box that pops up.
For those of you running Snow Leopard (10.6.8), after clicking ‘Open’ the workflow should open in Automator. Hit ‘command-S’ to save it as a Service.
For all users, if you now click up to any application name next to the Apple near the top left of your screen (see the screenshot at the top of this post) and scroll down to ‘Services’ you should see the new Service already there. If you don’t, try logging out and logging back in to your user account.
Once you can see the workflow in the Services menu, go ahead and give it a click to test it out. 🙂
A couple of notes on usage:
Carbon Copy Cloner does not have to be open for the Service to work.
The date format display is YYYY-MM-DD.
If you want to add a shortcut key as suggested earlier, open up System Preferences > Keyboard and click the ‘Shortcuts’ tab. Down the sidebar you should see ‘Services’. Click on that and scroll way down to the bottom till you see the name of the Service. Click ‘Add Shortcut’ and hit the keys you want to use. I like ‘command-control-C’ as it’s an easy mnemonic for ‘Carbon-Copy-Cloner’.
Time Machine – anywhere, anytime!

One of the nice new features of OS X Lion is that you can access your Time Machine backups even when you are disconnected from the drive such as on the commute to work or even while on holiday. The downside is it takes up a chunk of your HD that you might not want to give up. Fortunately, you can turn this feature on or off (it’s on by default in Macbook’s, but off by default in iMac/Mac Pro).
When the feature is on, local snapshots of the last few days’ Time Machine backups are stored on a local drive called MobileBackups. If your time machine backup disc should get corrupted for any reason, these can also serve as a second line of defence. Be careful though, these backups get replaced and updated without warning, so don’t rely on them for anything more than the last couple of days saves.

You can access these from the regular Time Machine icon. Alternatively, find them by clicking on the computer name at the bottom of the left-hand column in any Finder window, and then navigating to the MobileBackups drive.
If you want this option on your iMac/Mac Pro, you’ll have to enable it through Terminal. Open the Terminal application and paste in the following command:
sudo tmutil enablelocal
followed by your admin password and a return-key stroke (don’t expect to see anything when you type the password).
If Terminal returns to the prompt you should be good to go. Check by opening Time Machine preferences, which should now display the message that “Time machine keeps local snapshots as space permits and…” followed by the Time Machine backup schedule. If it hasn’t worked, it’ll just say “Time machine keeps:” and then the schedule.
If you wish to disable local snapshots to save disk space (mine takes up about 8GB), then just type:
sudo tmutil disablelocal

followed by your password. Don’t forget to quit Terminal straight after you’ve verified everything’s working. Enjoy!
Time Machine Preferences:

