Blog Archives
how to see what Time Machine has and will backup
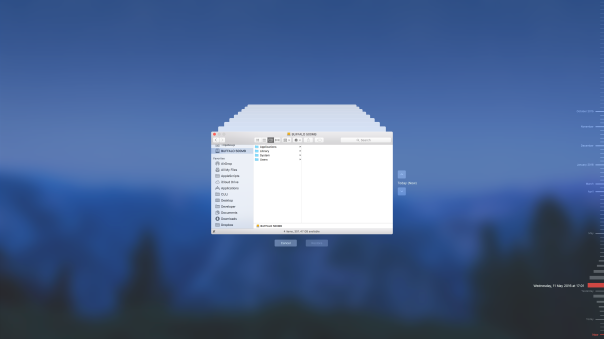
If you find Time Machine’s taciturn silence on what it has and will do a bit frustrating at times, the command line utility tmutil can offer you a bit more insight.
In particular, if you’d like to see what Time Machine is going to back up just before it’s about to run, execute the following command in the Terminal:
tmutil compare
That will compare the machine as it is now against the last backup (See the man page for more options on the output). It took about 5 minutes on my mac, but I have a small hard drive. It could take somewhat longer depending on how much data you’ve got to trawl through. Remember that you’re doing a diff on a moving target, so the less you can use the machine for other tasks while this command is running the faster it’ll complete.
On the other hand, you might want to know more about what Time Machine has just done after a backup. Which files did, or did not, get changed, added or removed?
You can find out what got backed up after the task finishes by comparing the most recent snapshot (the one that’s just completed), with the previous one (this is much faster, took about 35 seconds here). You can do that in Terminal, too, but the syntax can be a bit tricky. To make it easier, here’s a handy AppleScript that will do it for you. Just pop it into the (Apple)Script Editor.app and hit the ‘Run’ ▶︎ button.
# This script compares the most recent backup to the previous one
# indicating what was changed, added or removed
set backupList to paragraphs of (do shell script "tmutil listbackups")
if (count of backupList) < 2 then
display dialog "Sorry, couldn't find anything to compare. Try again after the next backup"
else
set path1 to quoted form of item -2 of backupList
set path2 to quoted form of item -1 of backupList
do shell script "tmutil compare " & path1 & " " & path2 & " | open -f"
end if
eject all your disks at once
Here’s a simple AppleScript one-liner that can be useful if, like me, you have several disks connected to your laptop at home or the office and you need to get up and go quickly.
1. Open the AppleScript Editor.app by typing Apples in the Spotlight search bar and hitting ‘return’.
2. Copy the following code into the editor window:
3. Hit ‘Command-K’ to compile and ensure you didn’t make any mistakes. Fix any typos if it doesn’t compile and try again. Save the script to your Desktop as ‘EjectAll.scpt’
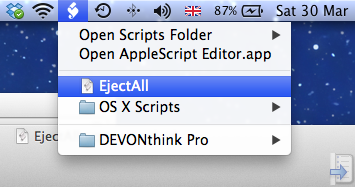
4. If you don’t already have the Scripts menubar icon visible in your menu bar, hit ‘command ,’ (that’s the Command key and the comma key) and check the ‘Show Script menu in menu bar’ item in the General pane of AppleScript’s Preferences window.
5. From the Scripts menu, choose ‘Open Scripts Folder > Open Computer Scripts Folder’ and drag ‘EjectAll.scpt’ from the Desktop to the Computer Scripts Folder. You’ll need to authenticate with an Admin password to complete the move.
And that’s it. Now whenever you want to eject every disk with one simple operation, just hit the Script menu icon and click on ‘EjectAll’. 🙂
how to remove a boot.efi file from Trash

Click on the Trash can on the Dock, hold down the ‘option’ key and click the ‘Empty’ button over there on the left side of the window. If this doesn’t do it, the file may be in the .Trash folder of your Time Machine (TM) or some other disk.
To find out if that’s so, follow this procedure:
1. Open Terminal.app, copy and paste the following command into the Terminal window
defaults write com.apple.finder AppleShowAllFiles TRUE; killall Finder
Then press ‘Return’.
2. Open a Finder window. Navigate to the TM disk starting from its icon in the left hand column. You should see some greyed out folders called .Trash and .Trashes. Click on these and have a look for the boot.efi file that we’re hunting down.
To remove the boot.efi file from the hidden trash, try the following:
3. Go back to Terminal and copy and paste the following:
sudo rm -rf
Do NOT press ‘Return’. Instead, press the Spacebar once, then use your cursor to drag the boot.efi file from the hidden folder in Step 2 and drop it in the Terminal window. Now press ‘Return’. You will be asked for an administrator password and given a warning which you can ignore. Type in your password, but notice that your typing will be invisible, so type carefully.
Press ‘Return’.
4. If you typed your password incorrectly, repeat step 3. If you typed it correctly, hopefully, your Trash is empty. 🙂
5. The last thing is to hide all the hidden files again, so copy and paste this:
defaults write com.apple.finder AppleShowAllFiles FALSE; killall Finder
Then press ‘Return’.
You can close Terminal now.
Good luck!
how to back up your Mac – the best way!
iCloud? Time Machine? Noooo……! We’re talking about the best way to backup your precious data, not the most convenient way…
What’s wrong with using the cloud? The fact that you need an internet connection, a password to be accepted, to act in accordance with the T&C of your cloud provider, the fact that someone – government, corporation, hacker – could interfere with your data, lose it or just add unwanted stuff to it. Also, if you want to backup your whole system then the various free storage offers are not going to be big enough to do the job, and you’re going to end up paying a lot more than if you backup your system properly.
How about Time Machine? Yes, it’s simple and convenient and pretty much automatic, but its not secure. TM has three major problems. First, it doesn’t allow proper archiving so anything you delete from your HDD will eventually get deleted from TM. Second, it doesn’t tell you what it’s doing before it does it, meaning you are at the mercy of its automated decisions. Third, it’s not bootable. If your whole system crashes or your HDD just fails, Time Machine won’t help you. You’ll have to restore the system or replace the HDD before you can use your machine again.
But there is a much better way, and aside from you providing the hardware (a couple of external hard disks), one that’s also free. The most secure system is to run an hourly or daily scheduled cloner on one disk, and a weekly cloner on the other. You can use SuperDuper or, my own favourite, Carbon Copy Cloner.
If you want to read up on and understand the various backup options and what they entail, you can’t do better than to read this superb post by Apple Discussions member ds store.
Time Machine – anywhere, anytime!
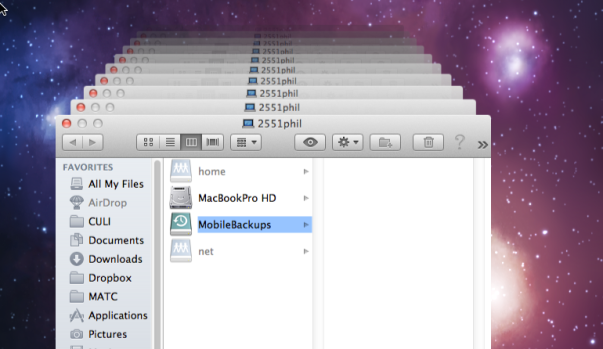
One of the nice new features of OS X Lion is that you can access your Time Machine backups even when you are disconnected from the drive such as on the commute to work or even while on holiday. The downside is it takes up a chunk of your HD that you might not want to give up. Fortunately, you can turn this feature on or off (it’s on by default in Macbook’s, but off by default in iMac/Mac Pro).
When the feature is on, local snapshots of the last few days’ Time Machine backups are stored on a local drive called MobileBackups. If your time machine backup disc should get corrupted for any reason, these can also serve as a second line of defence. Be careful though, these backups get replaced and updated without warning, so don’t rely on them for anything more than the last couple of days saves.
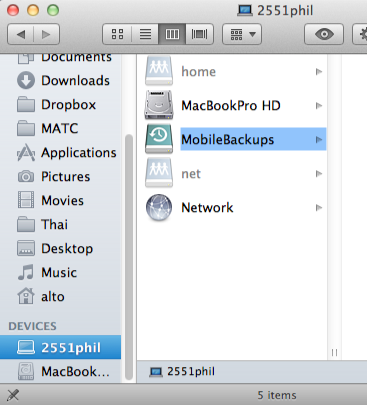
You can access these from the regular Time Machine icon. Alternatively, find them by clicking on the computer name at the bottom of the left-hand column in any Finder window, and then navigating to the MobileBackups drive.
If you want this option on your iMac/Mac Pro, you’ll have to enable it through Terminal. Open the Terminal application and paste in the following command:
sudo tmutil enablelocal
followed by your admin password and a return-key stroke (don’t expect to see anything when you type the password).
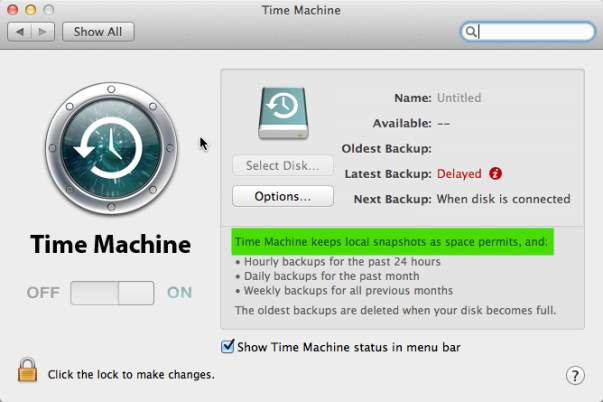
If Terminal returns to the prompt you should be good to go. Check by opening Time Machine preferences, which should now display the message that “Time machine keeps local snapshots as space permits and…” followed by the Time Machine backup schedule. If it hasn’t worked, it’ll just say “Time machine keeps:” and then the schedule.
If you wish to disable local snapshots to save disk space (mine takes up about 8GB), then just type:
sudo tmutil disablelocal
followed by your password. Don’t forget to quit Terminal straight after you’ve verified everything’s working. Enjoy!
Time Machine Preferences:
