Blog Archives
Deciphering the searchpartyd macOS process and its impacts
The searchpartyd process in macOS is an integral part of Apple’s innovative location tracking system, introduced with macOS 10.15 Catalina, iOS 13, and iPadOS 13.1. This daemon is a cornerstone of the Find My service, enabling users to locate their devices, even when offline. Understanding searchpartyd, its functionality, and addressing common issues like high CPU usage is crucial for macOS users.
The Integral role and functionality of searchpartyd
At its core, searchpartyd serves as a major daemon within the Offline Finding (OF) system of the Find My app. Its primary function is to generate the necessary cryptographic keys and perform all related cryptographic operations. This process is vital for synchronizing keys, sending location reports as a finder device, and obtaining location reports for devices owned by the user.
When a device equipped with the Find My feature is lost, it emits Bluetooth Low Energy (BLE) signals containing a public key. These signals are picked up by finder devices, which then use the key to encrypt the location of the lost device and send this information back to Apple’s servers. The Find My app accesses these reports to help users locate their missing devices.
The dual nature of searchpartyd process
Although the authentic searchpartyd process is an integral component of macOS’s security and geolocation functionalities, it is crucial for users to remain vigilant against potentially intrusive programs (PIPs) that could disguise themselves with analogous nomenclature. Such deceptive applications have the capability to alter web browser configurations, leading to unwarranted redirects and the proliferation of diverse forms of online advertisements. This activity not only disrupts user experience but also contributes to a noticeable reduction in the Mac’s operational efficiency.
Addressing high CPU usage and management concerns
A frequently reported issue among macOS users is the high CPU usage associated with searchpartyd. This can lead to problems like overheating and rapid battery depletion. Despite some misconceptions, searchpartyd is not a form of malware or virus but an authentic and essential part of macOS. However, users have limited control over this process due to its protected status within the operating system. Tools like EtreCheck are invaluable in identifying applications that may be causing excessive CPU usage by searchpartyd.

exploring sshd-keygen-wrapper on Mac
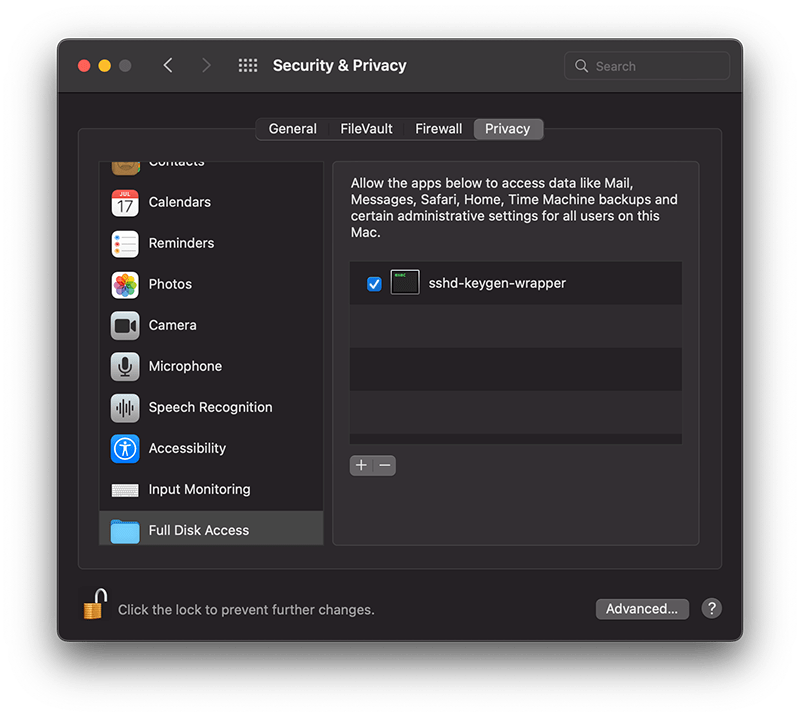
The sshd-keygen-wrapper tool, located within macOS Privacy settings, has garnered attention from users, particularly when they discover it in the Full Disk Access section of their Privacy preferences. While its presence might be disconcerting to some, a deeper understanding of its purpose and functionality can dispel any concerns.
The inclusion of sshd-keygen-wrapper in the Full Disk Access section can be perplexing. Some users may interpret it as an indication of a security compromise or malware. However, the reality is that sshd-keygen-wrapper is an integral component of macOS, functioning as an SSH secure shell key generator. Its primary role is to facilitate users in enabling or disabling remote access to their Mac via the Secure Shell Protocol (SSH).
The visibility of sshd-keygen-wrapper in Full Disk Access correlates with the Remote Login setting. Users who have never activated Remote Login will not encounter this tool. But for those who have, the tool will be present, albeit disabled by default, indicating that its access and permissions are inactive.
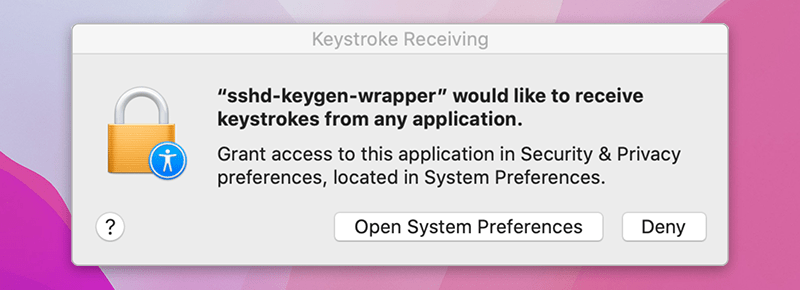
While navigating the Privacy settings on a Mac, users might come across a popup message stating, “‘sshd-keygen-wrapper’ would like to receive keystrokes from any application.” This message can be particularly perplexing, leading to concerns about the tool’s intentions and whether it poses any security risks.
Is it malware?
A prevalent misconception is associating sshd-keygen-wrapper with malware or unwanted software. Contrary to this belief, the tool is an authentic part of macOS and poses no malicious intent. Its placement in the Full Disk Access section is inherently tied to the SSH remote access feature. Activating SSH remote access from System Preferences ensures the association of sshd-keygen-wrapper, which then guarantees the generation of secure SSH shell keys for remote connections.
Should sshd-keygen-wrapper be granted Full Disk Access?
A frequently posed question revolves around whether sshd-keygen-wrapper should receive full disk access. Users contemplating remote access to their Mac via SSH might consider this option. By granting Full Disk Access to sshd-keygen-wrapper, macOS inherently extends the same privilege to SSH. As a result, any individual accessing the Mac through SSH can access all data, encompassing emails, messages, and files. The choice to activate this feature should stem from individual security assessments and requirements.
how to see active internet connections

I was playing around with some ways of detecting active network connections to add as a function in one of my apps — didn’t really work out, so far — but as I was prototyping the code in AppleScript I came up with this little ditty which some of you might be able to make use of:
1. Open the Script Editor
2. Paste the code below into it and hit ‘Run’
#start of script
on getConnections()
set theCmd to "lsof +c 0 -i -n | grep -i established | cut -d \" \" -f 1 | awk '!_[$0]++'"
set theMsg to (do shell script theCmd)
display dialog "The following apps & processes are actively using your internet connection: " & return & return & theMsg with title "Net Tattler" buttons {"Refresh", "OK"} default button "OK"
set theRes to button returned of the result as string
if theRes = "Refresh" then
getConnections()
end if
end getConnections
getConnections()
#eof
If you need more information than just the names of the process, you can play around in Terminal with lsof -i. Here’s a great little tutorial.
For something a bit more heavy-duty, check out either Little Snitch or Charles Web Debugging Proxy, both of which are paid-apps but offer free trials. If even those aren’t enough to satisfy your network monitoring desires, head on over to MurusFirewall.com and check out their packet filter GUI offerings for the Mac.
Enjoy 🙂
Acknowledgements
Thanks to the folks over at Etresoft for additional suggestions.
5 things you never knew about TextEdit

Although Apple’s oddball TextEdit.app has a variety of good formatting options, the chances are if you do any kind of word processing, you have one or more of the heavy duty apps like Pages, LibreOffice or Ms Word. If, on the other hand, you’re a coder or scripter who needs a plain text editor, you likely use Tincta, Sublime Editor 2, BBEdit, Coda or one of the many other full-featured editors that can do things like syntax colouring, snippet saving, script execution and so on that TextEdit can only dream of. Indeed, Apple have strangely forsaken giving their homegrown editor even a ‘line numbers’ option (though see tip 5 below), making it all but unusable for scripting.
Given its limitations, you might feel you haven’t been missing much by leaving TextEdit unloved and untouched in the Applications folder. However, here’s at least 5 reasons to think again.
1. Easiest way to create an audiobook.
I started off by calling TextEdit an ‘oddball’ app and here’s the first reason: name me another ostensibly “text editing” program that can make audio books? Dump any old text into a TextEdit window, and from the menu at the top choose ‘Edit > Speech > Start Speaking’. Plug in the headphones, sit back and relax! Works great with long online articles (but be sure to strip out any meta text and pictures first!). Also, don’t forget you can change the system voice in ‘System Preferences > Dictation & Speech’, and as I’ve pointed out elsewhere, foreign language learners can download optional voices and listen to foreign language text to improve their listening skills. For the parents among us, this one can also be great for the kids (both for them to listen to and create their own). 😉
To turn a TextEdit file into an audio book, select the entire text and from the menubar choose ‘TextEdit > Services > Add to iTunes as a Spoken Track’

2. Easy way to read, edit or save lengthy Terminal output
You can add
| open -f
to the end of any Terminal command, and (assuming TextEdit is your default editor) the output will be piped to a TextEdit window. This makes it easy to search, save or just scroll the output. This is particularly useful for reading and saving man pages. However, be aware that for some bizarre reason, man pages in particular tend to duplicate a number of characters in certain fields, which can affect readability. To prevent this here or with any other output you encounter that does the same, use
| col -b | open -f
after the Terminal command.
For example, if you enjoy hunting down defaults tricks, try this in Terminal. Type
defaults read | col -b | open -f
3. Easy way to get a file path
You can drag and drop any item from a Finder window into a TextEdit window to reveal that item’s path. This is a very handy trick if you need to quickly copy a file path to the clipboard. You can also drag urls from Safari’s address bar into a TextEdit window, or just drop them onto its Dock icon to get the same effect.
4. Easily share TextEdit content or files
Although TextEdit lacks the ‘Share’ icon in the menubar that was introduced to many apps in Mountain Lion, you can still access the ‘Share’ feature through the contextual (‘right/control click’) menu. Another oddity of TextEdit lurks here though: make sure the cursor in the TextEdit window is not on an empty line, or you won’t see the ‘Share’ option in the menu.

5. (not so) Easy way to get line numbers!
This one is for the coders among you. We all know TextEdit suffers from the lack of a ‘View line numbers’ option (come on, Apple – ridiculous!). There’s a few tips here. First, if you don’t know already, you can use the hotkey ‘command-L’ to go to any given line number. You can also find the total number of lines by using the ‘Find’ feature. Hit ‘control-F’ first, then click the spotlight in the filter bar. Choose ‘Insert Pattern’ and search for line breaks. You’ll see the total number of line breaks in the far right of the filter bar:

You can add pseudo (see below for why I call them ‘pseudo’) line numbers with a bit of Awk magic. Open Terminal.app and paste this into the window:
awk '{print FNR "\t" $0}'
Next drag and drop the file you want to add line numbers to into the Terminal window. Don’t worry, nothing you do here will change the original file. Apply your new found skill from Tip 2 above, typing a space and then a pipe onto the end of the command:
| open -f
so the whole thing might look something like this
awk '{print FNR "\t" $0}' ~/Desktop/myfile.txt | open -f
and hit ‘return’. Hey presto, you have a TextEdit file with “line numbers”.

Now, here’s the catch. I called these ‘pseudo’ line numbers because unlike real line numbers, the numbers are actually part of the text. That means if you select some portion of the text that spans line numbers, the numbers will be selected and copied too. In other words, you can’t properly copy and paste text, so be sure to keep your original version of the file for future editing purposes (*EDIT: see a workaround for this provided by Caroline in the Comments below).
So yes, TextEdit is an oddball program; it is like no other I know of for containing a bizarre mix of unrelated yet strangely powerful features coupled with the inexplicable absence of basic functionality that any other program would be handicapped without. Nonetheless, I hope this post has given you some ideas of how you can use TextEdit to better effect in your work and play. 🙂
Featured picture: Purple Glass Text Edit Icon by ~Drawder
get ready for Mountain Lion

With the last seven days of July upon us, the suspense is just killing some people waiting for the release of Apple’s latest version of OS X, 10.8 Mountain Lion. While rumours abound for just about every conceivable day left being the ‘official’ release date (with the 25th being the most popular, it seems), the sensible are making sure they’re prepared. So here’s a few things to do both before and on the big day:
1. Check the tech specs
Check out the tech specs for Mountain Lion and the list of supported machines to make sure you can run it on your current system. If you are upgrading from Snow Leopard, you should also check out will my old apps work with Lion?.
2. Run Software Update
Make sure you have the latest version of everything by running
> Software Update
before you upgrade. This will help to cut down any compatibility problems when installing Mountain Lion.
3. Backup your current install
Without a doubt the biggest cause of trouble and frustration with every OS release is among users who didn’t backup their systems before trying to install the new one. Like Lion, Mountain Lion will be delivered as a download from the App Store, and while this method is certainly convenient, corrupted downloads are not uncommon. Moreover, even when the install proceeds as expected, you want to be able to get back to your previous system if you find things are not to your liking. An OS installation is like performing major surgery on your computer and the chances of complications are always a significant risk. As the old boy scout saying goes ‘Be Prepared’. Backup, backup, backup.
4. Remove everything from your Login Items.
For Lion users, that’s
> System Preferences…> Users & Groups | Login Items
If you’re upgrading from Snow Leopard 10.6.8, go to
> System Preferences…> Accounts | Login Items
There’s a couple of reasons for doing this, but mainly it’s to ensure that you can log in without difficulty. Login Items are one of the main causes of OS problems at the best of times, but with a major upgrade like this, you don’t want any incompatible software choking the system from booting up. See Steps 8 & 9 below about re-activating your Login Items after the installation.
5. Uninstall AV software & other utilities
If you have Sophos, VirusBarrier, iAntiVirus, F-Secure, or similar uninstall these prior to upgrading. After upgrading, if you must use them, look for updates. Uninstall MacKeeper, Little Snitch, LogMeIn or any other 3rd party utility that runs prior to user login.
6. Be prepared for slow download times
Apple’s servers will be hotter than a forest fire on release day, so you can expect download times to be pretty poor. At the very least, connect your computer to your router via ethernet cable rather than wifi – that’ll at least help push things along a bit faster at your end. If you can do it from the office or somewhere else that has a lot more bandwidth than the usual home connection, do so.
7. Save the installer
After the download completes the installer will run automatically. Do NOT click ‘Install’, but instead quit it. Then go to your Applications folder and copy the ‘Install OS X Mountain Lion .app’ and save it to your Downloads folder or somewhere else. Then you can run the installer in your Applications folder.
The reason for doing this is that when you install Mountain Lion the Install app in your Applications folder will self-delete. If the install shouldn’t work for some reason the first time round, you won’t have to go through the whole tiresome wait of a download from the App store again if you save a copy to your Downloads folder.
8. Update 3rd-party apps
Assuming Mountain Lion boots up just fine, the first thing you’re going to want to do (after having a nose around, of course!) is update your 3rd party apps. Start off by opening the App store to see if any that you’ve sourced from there have updates waiting for you. After that, start up all the main apps that you normally use and use their ‘Check for Updates’ option (usually in the Apps main menu), or contact the developers through their websites. If you use Parallels 7, you will need to update that before trying to run your virtual machines.
9. Test your Login Items apps
In particular, you’re going to want to test out the apps that you want to put back in your Login Items, before you put them back in there. Run each app and play around with the system for a couple of hours before deciding to put it back in your Login Items list. If you notice any weird behaviour with Finder, the Dock or Desktop backgrounds, problems with wifi or graphics, chances are one or more of your 3rd party apps needs updating to work with Mountain Lion. If there is no update yet, stop using that app till one becomes available or find an alternative. In general, it’s always best to keep Login Items down to a bare minimum. Running apps at login is a sure fire way to slow down boot up times.
10. Check back with Applehelpwriter.com
As always, I’ll be here with tips on how to get the most out of OS X and how to solve some common problems. See you then!🙂
how to change all Desktop backgrounds

With Lion came the welcome ability to have individual background wallpapers for each Desktop. However, what Apple forgot to add was an option to easily make all the Desktops have the same background image when you want it that way.
There are a few workarounds, but probably the simplest – once it is setup – is to use this little script I wrote for some ASC members. It should take you about 5 to 10 minutes to set this up if you follow the procedure carefully.
1. Open TextEdit, and choose TextEdit > Preferences.
Change the settings from ‘Rich Text’ to ‘Plain text’ for New Documents. Close the Preference pane and chose File > New.
2. Copy everything in the box below and paste it into the TextEdit file you just opened:
#! /bin/bash
#script to change all desktop backgroundsecho -n “Drag and drop an image file here then press ‘return’ or
press ‘control-c’ to cancel…”
read -e WLPR;function change_wallpaper
{
defaults write com.apple.desktop Background “{default = {ImageFilePath=’$WLPR’; };}”; killall Dock
}
change_wallpaper
3. Save the file to
/Library/Desktop Pictures
with the name ‘ChangeAllDesktops’.
IMPORTANT: Make sure you remove the ‘.txt’ file extension in the name field AND uncheck the option at the bottom of the Save box that says ‘If no extension is provided, use .txt’.
Note that you will need to press the ‘authenticate’ button when prompted in order to save anything into the ‘Desktop Pictures’ folder. Type your password in the dialogue that pops up.
4. Open Terminal.app.
Make the ‘ChangesAllDesktops’ file executable by copy/pasting this into the Terminal window:
sudo chmod a+x /Library/Desktop\ Pictures/ChangeAllDesktops
Press ‘return’ and type in your password. The password won’t echo to the screen, so type carefully.
5. Make Terminal the default app for the file
Open a Finder window. Click on your hard disk icon in the sidebar (if you can’t see it, go to Finder > Preferences > Sidebar and check Hard disks under the ‘Devices’ section). Navigate to the Library/Desktop Pictures folder and right-click on the ‘ChangeAllDesktops’ file.
Select Open with and then Other…. In the window, navigate to Terminal.app in /Applications/Utilities. It will be greyed out, so change “Recommended Applications” to “All Applications” in the menu at the bottom of the window. Do not check “Always Open With”. Choose ‘Terminal.app’ and ‘OK’.
6. Make a shortcut for Desktop Pictures
Drag the folder ‘Desktop Pictures’ to the Finder sidebar to make a convenient shortcut. Now when you want to change all Desktop backgrounds at the same time, click in ‘Desktop Pictures’ in the Finder sidebar, run the ‘ChangeAllDesktops’ file, and drag an image from the (already) open Finder window into the Terminal window that appears.
Press ‘return’ and your desktops are all changed! 🙂
Related Posts
learning the Terminal — Part One
learning the Terminal — Part Two
change Flag names in Mail
‘Red’, ‘Green’ and ‘Yellow’ aren’t particularly meaningful ways to categorise messages, but changing the names to something more useful can make the ‘Flags’ feature a handy tool.
The procedure is quite simple, but the first thing you have to do is actually flag a couple of messages:
1. Flag some messages (one of each colour if you want seven categories):

2. Next, go into the sidebar in Mail. Click the little disclosure triangle:

3. Click on one of the names and press ‘return’ on the keyboard:

4. Type in a new name and press ‘return’ again:

5. Of course, you can change the flag names at any time:

how to get Spaces and Expose on Lion

(Note: If you’ve just installed Mountain Lion, be sure to run ‘Check for Updates’ by clicking on the Total Spaces icon in the menubar)
Yes, it’s possible to bring back most of those beloved Snow Leopard features that Apple unwisely did away with in Lion, and – if you get them now – for free with 3rd-party apps. I’ve been hunting down a way to get rid of all the Mission Control behaviour on my trackpad, to return the app-switcher trackpad gesture, the 2-dimensional Spaces grid and, of course, Expose.
OK, so here’s how I finally got all those lovely Snow features back to Lion. You’re going to need two free tools (free for now, so don’t hang around…), namely:
Total Spaces from http://totalspaces.binaryage.com
Better Touch Tool from http://blog.boastr.net
Once you’ve downloaded these you’re half way there, but you’ve got to complete the job by setting them up properly. In the remainder of this post, I’ll walk you through how I’ve got them set up. Try it this way first, then once you’ve got the hang of it, you can tweak it to your own style. 🙂
1. Total Spaces > Preferences:

</p?


In BetterTouchTool Preferences:

In > System Preferences > Trackpad:


Finally, disable the Mission Control hotkeys in > System Preferences > Keyboard | Keyboard Shortcuts:

With this configuration, you change spaces by holding down ‘option’ and any of the arrow keys to move round a grid of 9 spaces (you can have more or less if you want in TotalSpaces prefs).
You see all spaces (like the screenshot at the top of the page) by holding down ‘command-option-left_arrow’.
You bring up Expose with a 4-finger downward swipe on the trackpad (note: Expose is unavailable while an app is in Full Screen mode), and the App Switcher with a 3-finger tap.
Oh, and Mission Control? Drag it off the Dock to about centre screen and release. Should you ever need it you can always go and double-click on it in your Applications folder, but otherwise you’ll soon forget it ever existed.
And that’s it — proper Spaces, Expose, and Trackpad functionality restored! 🙂
")
how to secure your mac (OS X Lion)

Security in OS X Lion is a big problem that not many people are aware of, and here’s why: your Lion computer contains the install/recovery disk on the internal drive. That means anyone with a basic knowledge of Mac and Lion can start up your mac and reset your passwords, thereby accessing your user accounts and all your personal data. The same trick can help kids easily get round restrictions applied through OS X’s ‘Parental Controls’ feature.
How is this possible, you may ask? First, a little history. Among the 250 changes vaunted about Lion over its predecessor, Snow Leopard, there is one that is widely known but whose implications are rarely pointed out: you download the OS rather than install it from a disc. In the past, if your OS went bad and needed to be recovered, or you forgot your admin passwords, the simplest answer was to insert your install disk. From that, you could restore the OS and reset your passwords. That made your Mac a little safer (though not entirely safe) so long as your disc was kept somewhere physically different from your computer.
With Lion having no install disc, Apple had to find an answer as to how to provide the recovery option. The solution was to install a Recovery partition on the same disk as the operating system itself. In the event that the OS goes bottoms up and needs to be recovered or re-installed, you just restart your computer holding down the ‘command’ and ‘r’ keys to access the Recovery partition.
So far so good, but likewise, just as with the old DVD install discs, you — or anyone else — can also reset the user account passwords from the Recovery partition. That means your passwords are effectively useless. Anyone who wants to hack your user account just has to restart your Mac holding down ‘command’ and ‘r’ and then use the built-in Password Utility to make new passwords for your accounts. Now I’m not going to tell you quite how to do it (you do need a little knowledge to get the user account names and know how to do the reset) but it is widely publicized elsewhere, and indeed even in Apple’s own online documentation (so if you really want to know, google is your friend or follow some of the links in this post…).
What’s the answer to this security nightmare? Here’s one thing that’s NOT the answer but which I have seen widely touted: setting a firmware password. If you’re not familiar with the concept of the firmware password, don’t worry. It is practically useless, since anyone can reset that simply by taking off the back of your computer, and then pulling out and then putting back in one of the memory chips.
Apple, of course, thought about this problem. Their own solution is to encourage you to use FileVault 2 (FV2) to encrypt all your data. Indeed, this is the BEST solution. Without your password, no one can access the disk on your computer no matter what they do (and that includes YOU if you forget it…). However, there are a couple of drawbacks to FV2. One is that it requires extra disk space, and if you have more than one partition on your hard drive, or a lot of data, and little space you may not be able to encrypt and decrypt your data. The other drawback is that FV2 places a little extra wear-and-tear on your hard disk (though that may be negligible given the security pay off).
Using FileVault 2 is really the only security option if you’re using Lion. However, if you don’t have the space for it, there is a ‘second-best’ strategy (see below why it’s only ‘second best’), and that is to remove the recovery disk and use a clone as your recovery option instead (WARNING: the Recovery disk is required for FileVault 2, so by removing it you will also remove the ability to use FV2).
There’s a couple of ways to remove the recovery partition on your internal disk, but this is probably the best:
1. Clone your current system to an external disk using Carbon Copy Cloner. This will clone your entire system exactly as it is now, but it will not copy the Recovery disk.
2. Still booted into your internal OS (the one on your machine), open Terminal.app and paste the following command:
defaults write com.apple.DiskUtility DUDebugMenuEnabled 1
Press ‘Return’.
3. Open Disk Utility.app (Applications/Utilities/Disk Utility.app). In the menu bar of Disk Utility, choose Debug > Show Every Partition.
4. In the left-hand pane of Disk Utility, you can now see the Recovery HD. Click on it. Then click on the Erase tab on the (larger) right-hand pane. Click the Erase button down there on the bottom right.
5. Quit Disk Utility.
Now you can use your bootable clone as your recovery disk if your OS becomes corrupt and no one can boot up your computer with ‘command-r’. If you keep the clone backed up on a regular incremental schedule (you can choose anything from once an hour, once a day, week, or month), you can simply restore a corrupted internal disk to exactly the same state as your last backup.
Why only ‘second best’?
As alluded to earlier, it is still possible for advanced users to start up your mac and reset the password without the Recovery partition (this was also true in Snow Leopard even without the install disc). In fact, what this procedure does is give your OS X Lion installation the same security level as an OS X Snow Leopard installation, which is not actually that great, but better than Lion with a Recovery disk! Also, if you are storing highly sensitive data, don’t neglect the fact that someone who has complete unfettered access to your hard drive could even remove the disk and recover the data using special software.
The short story is if you want to be absolutely certain that your data is secure, FileVault 2 is really your only option.
featured picture Security Workstation by digitalhadz
easiest way to find your serial number

Click > About This Mac… then click on the greyed out text underneath the black ‘Mac OS X‘.
It probably says ‘Version 10.7.2’. When you click on it, it will change to the OS build number. Click on it again and you’ll see your serial number. Easy 🙂


