Blog Archives
make your own Trash Watcher utility
So twice in the last couple of weeks, I’ve found that something funny has been going on with Xcode, source control and Dropbox. The weird behaviour is that both times a whole load of my Xcode projects got moved to the Trash without my knowledge or permission. Fortunately, I noticed in both cases, and while I haven’t got to the bottom of the problem yet, I thought the first thing I’d better do is a bit of defensive scripting!
With that in mind, I created this little Trash Watcher utility to warn me anytime something is moved to the Trash. It’s quick and easy to make, and you can customise it to do various other things apart from give a warning if you like (for example, you could make it delete files of a certain kind, size or date automatically).
Start by opening the AppleScript editor (or Script Editor on 10.10), and paste the following lines into it:
on adding folder items to this_folder after receiving added_items
set listOfFiles to {}
repeat with i from 1 to the count of added_items
set a_file to item i of added_items as text
set stripTrashPath to offset of “Trash” in a_file
set a_file to text (stripTrashPath + 6) thru -1 of a_file
set a_file to a_file & “
“
set end of listOfFiles to a_file
end repeat
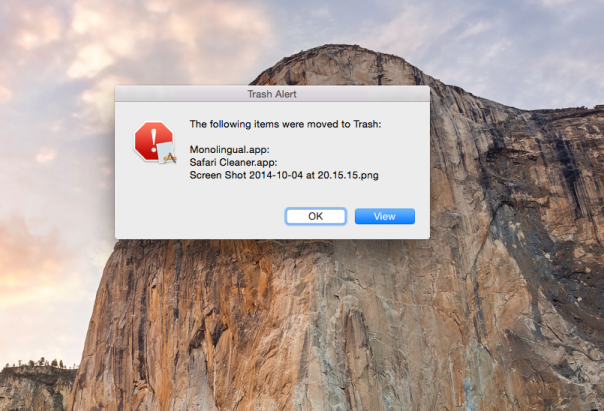
display dialog "The following items were moved to Trash: " & return & return & listOfFiles buttons {"OK", "View"} default button "View" cancel button {"OK"} with title "Trash Alert" with icon 0
set btn to button returned of the result
if (btn = "View") then
tell application "Finder" to open the trash
end if
end adding folder items to
Here’s what the code does. The first and last lines define a Folder actions handler, where the variables ‘this_folder’ and ‘added_items’ will be replaced by the name of the folder you attach this script too (we’ll do that in a minute), namely the Trash folder, and the items that have been moved to the Trash.
The next line, declares an empty list, so that we can populate it later with just the names of the items, rather than their full path adddress.
Then comes the repeat block. This first determines how many items there are to be added and then iterates over them, applying the five ‘set’ commands on each file. Those five commands are all doing one thing: stripping the path from the item name down to just the item name itself so that we can display it nicely in the display dialog command that follows.
Note that the display dialog command adds a couple of buttons, and collects the result as to which button you pressed. Notice that “OK” (typically an action button) is used to dismiss or cancel the dialog. “View” opens the Trash folder in the event that you want to check or remove the items that have been added.
With the Script editor active, make sure your script compiles by pressing ‘Command-K’, but don’t try to run it yet. We need to attach save the script in the right place first, and then attach it to the Trash folder.
With Script editor still active, press ‘Command-S’ to bring up the ‘Save’ dialog box. Give it a descriptive name like ‘TrashWatcher.scpt’ or similar. Do not click ‘Save’, but instead press, ‘Command-Shif-G’ on your keyboard and enter this location into the box that pops up:
~/Library
and click ‘Go’. In the resulting window, scroll down to the Scripts folder and look inside it. If there is already a folder called ‘Folder Action Scripts’ then save the script in there. If not, click ‘New Folder’ in the bottom left of the window, and create a ‘Folder Action Scripts’ folder (be sure to get the name exactly right).
With the script saved in ~/Library/Scripts/Folder Action Scripts/, right click on any folder in a Finder window and choose ‘Services > Folder Action Setup’ from the contextual menu.

This will open a new dialog box with a list of scripts to choose from. Choose the TrashWatcher.scpt (or whatever you happened to call it) and click “Attach”. In the remaining panel, make sure the Trash folder is selected and no other.

That’s pretty much it; your TrashWatcher folder is set up, so move something to the Trash and make sure it fires. Everything OK? Hmm, maybe, but we need a few refinements. For one thing, every now and again OS X will move the .DS_Store files to the Trash, and we don’t want to know about these. Also, it would be good if the file name actually indicated whether it was file or a folder that was being moved. In fact, it does so already (Folders are indicated by a colon), but it would perhaps be clearer and more orthodox if folders were followed by a forward slash, as they are usually indicated that way in path names. To achieve both of these, refine the script above to look as follows, remembering to compile, save and test it (by moving something to the Trash, not from running in the Script Editor).
Finally, with a bit of imagination and experimentation, you could add various other conditions to this script. For example, you could have it immediately delete files that are of a certain size or certain kind as soon as they are placed in the trash (tip: you’ll need to use Finder’s “empty the Trash” command after testing each file for whatever criterion you want to use). I’ll leave those as exercises for the reader, but feel free to post your scripts in the comments if you’re particularly pleased with some variation you’ve come up with!
Happy Scripting!
‘delete’ doesn’t send files to Trash

If you find deleting a file deletes it immediately without sending it to the Trash first, you may need to fix permisssions on your Trash folder.
Open Terminal (Applications > Utilities > Terminal.app) and type
ls -alF
Scroll up if necessary to the beginning of the list and you should see a couple of folders whose names begin with a dot.
.Trash
.Trashes
Ignore .Trashes, but look at the permissions on .Trash, they should read like this (also see the pic above):
drwx- – – – – – <your_username> staff (size) (date) .Trash/
Ignore the numbers, but if the permissions are different or the username is not your account username, then do the following:
At the Terminal command prompt, type the following, replacing ‘your_username’ with (yep, you guessed it…) your username.
sudo chown -R your_username .Trash
For example, if my user name is ‘SnowLpd’ I would type
sudo chown -R SnowLpd .Trash
Then press ‘Return’. You will need to enter your password, which will be invisible when you type it (so type carefully). Now go and test your ‘delete’ function to see if the problem is cured. 🙂
Related Posts
how to remove a boot.efi file from Trash
Click on the Trash can on the Dock, hold down the ‘option’ key and click the ‘Empty’ button over there on the left side of the window. If this doesn’t do it, the file may be in the .Trash folder of your Time Machine (TM) or some other disk.
To find out if that’s so, follow this procedure:
1. Open Terminal.app, copy and paste the following command into the Terminal window
defaults write com.apple.finder AppleShowAllFiles TRUE; killall Finder
Then press ‘Return’.
2. Open a Finder window. Navigate to the TM disk starting from its icon in the left hand column. You should see some greyed out folders called .Trash and .Trashes. Click on these and have a look for the boot.efi file that we’re hunting down.
To remove the boot.efi file from the hidden trash, try the following:
3. Go back to Terminal and copy and paste the following:
sudo rm -rf
Do NOT press ‘Return’. Instead, press the Spacebar once, then use your cursor to drag the boot.efi file from the hidden folder in Step 2 and drop it in the Terminal window. Now press ‘Return’. You will be asked for an administrator password and given a warning which you can ignore. Type in your password, but notice that your typing will be invisible, so type carefully.
Press ‘Return’.
4. If you typed your password incorrectly, repeat step 3. If you typed it correctly, hopefully, your Trash is empty. 🙂
5. The last thing is to hide all the hidden files again, so copy and paste this:
defaults write com.apple.finder AppleShowAllFiles FALSE; killall Finder
Then press ‘Return’.
You can close Terminal now.
Good luck!
how to fix permissions (Permissions Pt 2)

(This post continues from here on file permission problems.)
Did you know there are two levels of permissions on your mac? User level and system level. Most discussions of fixing permissions only discuss the latter, but you may also need to fix the former (also sometimes called ‘ACLs’) for some problems caused by upgrading Lion on top of Snow Leopard.
4. System Level Permissions
You can safely repair your system level permissions at any time, and doing it once in a while is a good maintenance activity even if you’re not experiencing any problems. It’s also the first thing to do as soon as you notice any problems with apps launching, file access problems, or your computer seems to be running unusually slow.
How to do it:
— 1. Go to Applications > Utilities > Disk Utility.app and double click the app to open it.
— 2. Click your HDD icon in the left column (if you have more than one, click the one that contains your startup disk).
— 3. If it is not already selected, click on the ‘First Aid’ tab. Choose the ‘Repair Disk Permissions’ button near the bottom of the window (see the larger of the two windows in the screenshot above).
— 4. Wait for the process to finish (it could take ten minutes or more), then quit Disk Utility. You can ignore most of the error messages that appear unless they’re in red.
5. User Level Permissions (ACLs)
These permissions apply only to your ‘Home’ folder and its contents, and if you have more than one user you will need to do this procedure for any user experiencing a problem. However, unlike system level permissions, repairing ACLs isn’t something you should do unless there is a specific issue to be solved. Problems that this repair might help with include permission conflicts inherited from an earlier Snow Leopard or Leopard installation, such as Finder always asking for your password when you try to delete, move or copy a file.
To reset the ACLs in Lion: (To reset the ACLs in Leopard/Snow Leopard have a look here.)
— 1. Remove the current ACLs by opening Terminal.app (Applications > Utilities > Terminal.app) and copy and pasting this command:
sudo chmod -RN ~
Press return. You’ll be asked for your password. Notice that when you type it in you won’t see anything on the screen. Press return again. If you get an error message, you probably didn’t type in your password correctly. Repeat this step till its accepted. It will take some time to complete. Then paste this command into Terminal also:
sudo chown -R `id -un` ~
and press return. Enter your password again if necessary.
— 2. Press the Power button on the computer and choose ‘Restart’. When the screen goes blank, hold down the ‘command’ and ‘R’ keys on the keyboard until you hear the start up chime. In the menu bar at the top, choose Utilities > Terminal
— 3. At the Terminal prompt type
resetpassword
Then hit ‘Return’
— 4. Forget about resetting your password; what you’re looking for is your hard disk icon at the top. Hit that, and then from the drop-down menu select your user account.
— 5. Go to the bottom of the dialogue window – leaving all password fields blank – and choose ‘Reset’ under ‘Reset Home Folder Permissions and ACLs’ (see the smaller of the two windows in the screenshot above, inside the red dotted line).
— 6. When the process finishes, quit everything and restart your Mac. 🙂
Related Posts
How to Troubleshoot Your Mac with FT2
can’t create kext cache error
FastTasks – download the free OS X utility app from Applehelpwriter

